E-Commerce - Autify

Barclays ePDQ support ends – Consider these alternative payment gateways

Barclays ePDQ support ends – Consider these alternative payment gateways

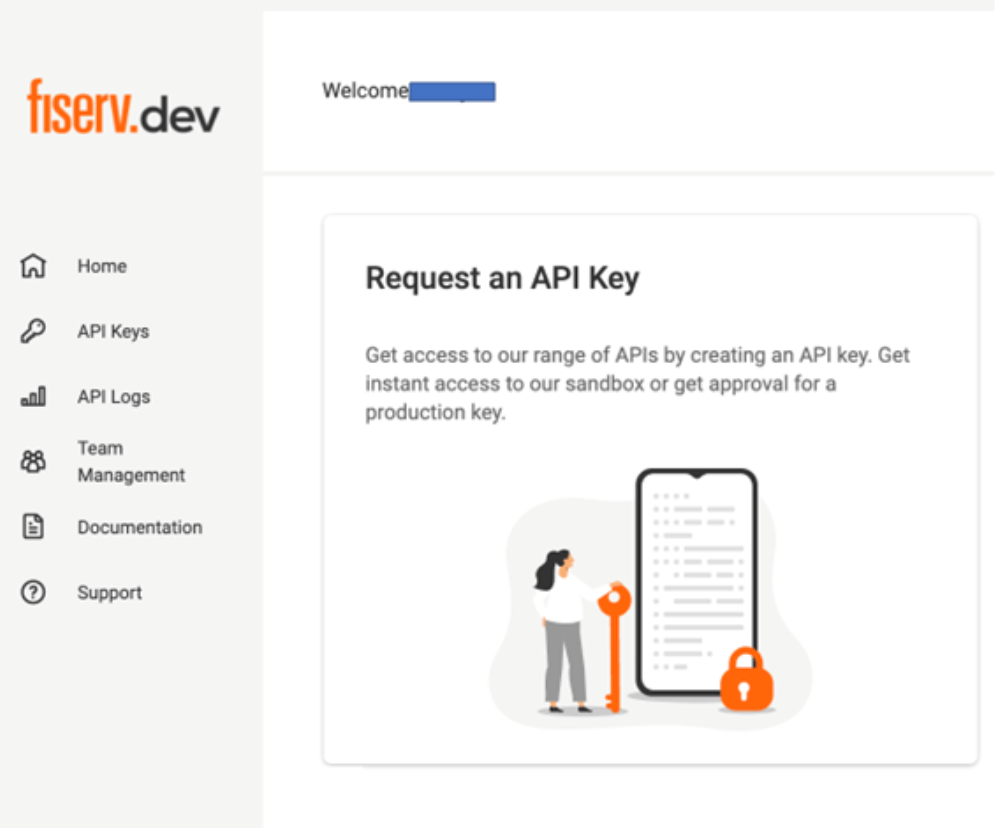
Support for Barclays ePDQ is ending in March 2026. For businesses that rely on the solution to accept online payments, it’s time to find an alternative.  

Why do you need a new payment gateway?

As the solution becomes unsupported, businesses are at risk of experiencing disruption to their usual payment acceptance. Not only will this lead to lost revenue as customers are unable to pay online, but it may also cause frustration, a spike in customer complaints, and ultimately, lead them to shop elsewhere.  

On top of this, there is also the risk of fraud and data breaches, as unsupported systems do not benefit from the latest security updates to counteract evolving cyber threats. Remedying an attack can be costly to the business, both financially and in terms of reputation.  

Therefore, it is in every business’ best interest to seek an alternative solution when their payment gateway is decommissioned, like ePDQ. Those that migrate sooner can stay ahead of the competition when it comes to the latest features, security and customer experience.  

Which payment gateway should you switch to?

The good news is you can now re-evaluate your business needs and the various options out there to find something perfectly suited to you and your customers.  

It’s a great time to do your research and understand what may have changed in the payments world since you last updated your gateway. Perhaps there are some new features you’re missing out on? Or maybe your business will benefit from greater backend control?  

To help you in your search, we’ve outlined some ePDQ alternatives to consider:  

AIB MS AuthiPay

Supported by Allied Irish Bank, the AuthiPay gateway offers businesses a secure and reliable solution to accept and process payments online.  

Autify offers AIB MS AuthiPay integrations for Magento, WooCommerce, OpenCart, PrestaShop and Drupal. We also offer a non-ecommerce solution for WordPress, for businesses to accept online payments without ecommerce checkout functionality.  

Key features of our AIB MS AuthiPay plugins: 

  • Hosted payment journey – users are redirected to the AIB MS AuthiPay hosted payment page to securely complete their purchase.  
  • Embedded payment journey – place an embedded payment form directly on your website’s checkout page. 
  • Digital wallets can be enabled for convenient on-site checkout via ApplePay and GooglePay. 
  • Full and partial refund processing from the website backend. 
  • Real-time reporting – transaction statuses are immediately synced to the order reporting in the website backend.  
  • Subscriptions – accept regular, reoccurring payments on WooCommerce and Magento with subscription functionality. 

View integrations 

Cardstream

Cardstream is a secure payment provider, with a robust, flexible and scalable solution that offers merchants a range of payment capabilities.  

Autify have developed a smart payment gateway integration that connects Cardstream’s payment gateway with WooCommerce, allowing businesses to benefit from the providers convenient functionalities directly on their WooCommerce website.   

Key features of our Cardstream plugin: 

  • Hosted and embedded payment journey support – businesses can redirect customers to a secure payment page hosted by Cardstream, or allow them to complete purchases directly within their WooCommerce checkout via an embedded iframe payment form. 
  • Digital wallets, such as ApplePay and GooglePay can be used to pay for orders. 
  • Block checkout compatibility for seamless WooCommerce integration.  
  • Refund management within the WooCommerce backend allows merchants to process full and partial refunds.  
  • Reporting dashboard provides real-time data on transactions and statuses.  

View integration  

Clover

Part of the global Fiserv group, Clover offers advanced payment processing for small and medium sized businesses.  

Our payment integrations for Clover are compatible with Magento, WooCommerce, WordPress, OpenCart and PrestaShop. 

Key features of our Clover plugins: 

  • Hosted payment journey – supports redirected payment journeys where customers are taken to a payment page hosted by Clover to complete a purchase. 
  • Embedded payment form – use the iframe code to display a payment form directly on your website’s checkout page.  
  • ApplePay and GooglePay available on-site and via the hosted payment page for convenient checkout options. 
  • Tokenisation – allow customers to save card details securely to use for future transactions with tokenisation. 
  • Accept payments in multiple currencies  
  • Detailed, real-time transaction reports in the website backend with synced transaction statuses. 
  • Subscriptions – collect regular, recocurring subscription payments from customers on Magento and WooCommerce. 

View integrations 

Lloyds Cardnet

Lloyds Cardnet (Lloyds Bank Online Payments) is a trusted online payment solution from the leading UK bank, offering businesses a range of payment processing benefits and reliable customer support  

Built in partnership with Lloyds Bank, Autify provides Cardner payment gateway integrations for Magento, WooCommerce, OpenCart, PrestaShop and Drupal. We also support PayNow solutions for WordPress and Magento, for customers seeking a way to collect payments for invoices or other services, without requiring ecommerce functionality on their website.  

Key features of our Lloyds Cardnet plugins: 

  • Supports both hosted and embedded payment journeys – businesses can choose to use a hosted payment page which customers are redirected to after placing an order, or embed a payment form directly on their website’s checkout page. 
  • Express checkout options with digital wallets – ApplePay and GooglePay can be displayed on product, cart and checkout pages, for a quick and convenient, one-click checkout, or offered via the redirected payment route.  
  • Mail order/telephone order (MOTO) payments functionality allows businesses to securely take customer payments via phone or email. 
  • Tokenisation – allow customers to securely save card details for convenient future payments via tokenisation. 
  • Process full and partial refunds directly from the website backend.  
  • Subscriptions – set up and accept reoccurring payments on WooCommerce. 
  • Real-time reporting with transaction statuses synced with website’s order reports.  

View integrations 

Taylr

Taylr is an ecommerce-first payment platform, offering merchants easy, convenient and flexible payment processing capability. 

Autify offer an advanced Taylr payment gateway integration for WooCommerce. 

Key features of our Taylr plugin: 

  • Hosted and embedded payment journeys available, so customers can either be redirected to a hosted payment page, or complete a purchase on the website via and embedded payment form.  
  • Express checkout with on-site wallet integration for ApplePay and GooglePay. 
  • Refund processing for both full and partial amounts from the website backend. 
  • Detailed order reporting with real-time transaction status updates. 

View integrations 

Tyl by NatWest

NatWest’s payment gateway offering, Tyl, offers small and medium sized UK businesses a convenient and easy to set up payment acceptance solution. Businesses using the solution get access to a NatWest hosted Virtual Terminal, with many more controls and functionalities.  

We offer a range of payment gateway integrations for Tyl that have been developed in partnership with NatWest. Our solutions include plugins that are compatible with Magento, WooCommerce, OpenCart, PrestaShop and Drupal. We also provide PayNow integrations for WordPress and Magento, which enables businesses to collect payments without needing to have ecommerce functionality available on their website.  

Key features of our Tyl by NatWest plugins: 

  • Support hosted payment journeys, so customer are redirected to a payment page hosted by NatWest to complete their billing details, and then sent back to the website once the transaction has been successfully processed, or if an error has occurred.  
  • Digital wallets – Allow customers to pay with ApplePay and GooglePay on the hosted payment page. 
  • Customisable payment page to keep brand consistency and instil customer trust. 
  • Real-time reporting with synced transaction statuses in the website backend. 
  • Process full and partial refunds via theTyl by NatWest Virtual Terminal.  

View integrations 


If you’d like to discuss your options with our friendly team of payment experts, please do not hesitate to get in touch. 

How to switch to a new payment gateway?

Once you have decided on which payment provider to switch to, a careful migration plan needs to be created.  

Our team has helped hundreds of businesses migrate to a new payment gateway, and this is our advice: 

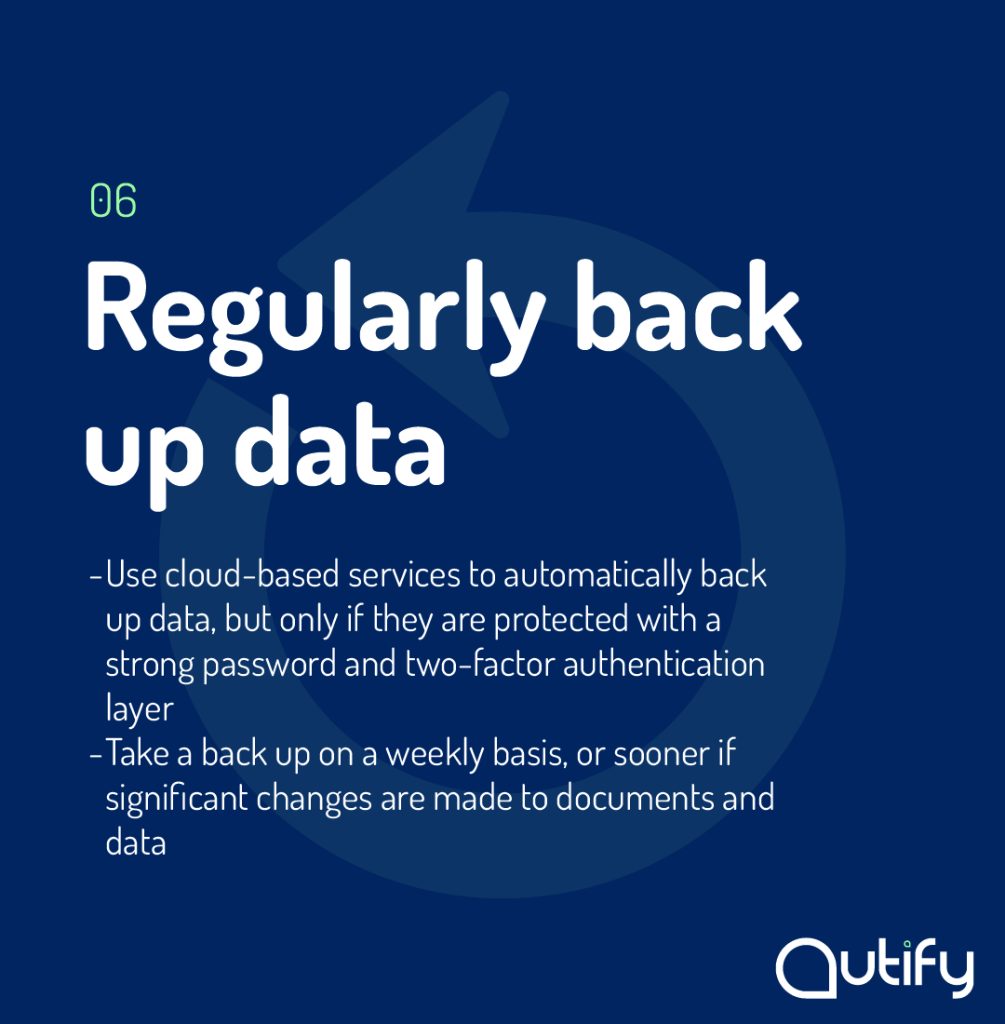
  1. Take a database back up before making any significant changes to your website. 
  2. Review your list of installed plugins or modules, and remove any that are no longer needed, or supported, and update any that have a new available version. This will help avoid any conflicts with the new payment gateway integration. 
  3. Complete all the onboarding steps with the new payment provider before beginning the installation process. To set up the website integration, you will require details such as your merchant ID and shared secret, which will be provided by the payment handler once you are a registered merchant. 
  4. Seek the help of your website developer or IT team to ensure the new integration is set up correctly. If you do not have access to this resource, our team offers a professional installation service as an optional addition to plugin purchases/downloads.  
  5. Complete some test transactions on the website once the new integration is in place to make sure the customer journey is smooth and you are familiar with any new features or process changes.  
  6. Allow additional time to set up things like on-site digital wallets. These features require a few additional steps, so may take a little longer to implement than standard card processing.  
  7. Consider ongoing support – once you’re up and running with your new payment integration, you’ll want to keep it that way! Each of our products comes with free support included in the yearly subscription, meaning you’ll have access to round the clock support from our integration developers.  

Trusted payment gateway support

At Autify, we pride ourselves in building and supporting some market-leading payment gateway solutions. With years of experience in this space, we have the knowledge and skills to help you find an alternative solution to your current provider and migrate to a new integration – stress-free and with confidence.  

If you’d like to discuss your requirements with our helpful team, please get in touch at helpdesk@autify.co.uk 

What We Learned Building an Official Shopify Payment App

Shopify is one of the world’s leading ecommerce platforms, with a growing number of merchants relying on it. For payment providers, being part of Shopify’s ecosystem offers access to a large and active merchant base – but designing a Shopify payment app comes with specific challenges. Shopify payment app development is still relatively niche in the UK, so there aren’t many resources out there to guide you through the process. This is especially true if you’re building a buy now pay later solution that requires finance approval and documentation beyond a simple card transaction. Here are the key lessons we learned at Autify that can help you avoid the most common pitfalls.

Understanding Shopify’s Payment App Constraints

Shopify’s rules for payment apps are strict. Payment apps must use only the Shopify payment API, and transactions can only result in limited outcomes – accepted, rejected or, in some cases, pending. You can’t embed custom checkout logic beyond that, even if it would improve the customer experience.

We had to learn this the hard way at Autify. Initially, we wanted to build in more features to handle buy now pay later finance approvals, but Shopify simply doesn’t allow it. When we tried to build in these features, Shopify told us to remove them. The key takeaway here is simple: keep payment apps minimal and follow Shopify’s basic ruleset from the start. Trying to work around these constraints will only slow you down.

Start Simple and Split When Needed

Complex payment solutions like buy now pay later involve finance approval, additional documentation and timelines that can stretch over hours or even days. This might tempt you to build something feature-rich from the outset. Don’t do it. Keep the first version as simple as possible, because the approval process can take a long time.

Autify’s strategy was to split the solution into two separate apps. The first is a straightforward payment app that handles the core payment flow within Shopify’s constraints. The second is an admin app that takes on all the complex merchant-facing features we couldn’t include in the payment app itself. This approach not only streamlined the approval process but also allowed us to deliver a better experience for both customers and merchants without compromising functionality.

Even the second app should be kept minimal in its first version. Keeping it simple accelerates approval and gets you to market faster. You can always add features later.

It’s also worth noting that refund handling is mandatory for all payment apps, so factor that into your design from day one.

The Logo Approval Process: Don’t Put It Off

Getting your logo approved might not be at the front of your mind when you’re in the middle of development, but it should be. Building an app is one thing. Getting the app approved is another. But getting the logo approved?

Logo approval is an entirely separate process from app approval and managed by a different team. In our experience, it typically takes four to eight weeks to get your payment provider’s logo approved and live.

To keep it from derailing your timeline, you should start the logo approval process at the very beginning of development, in parallel with building the app itself. Don’t assume it’s a quick formality – plan for it from the start.

Navigating the App Approval Process

The Shopify payment app approval process itself can take one to two months, and that’s excluding your development time. The timeline depends entirely on the availability of Shopify’s payment app approval team, and there’s no way to speed it up.

The process works like this:

  • You submit your app to Shopify.
  • Shopify reviews your submission within one to two weeks.
  • If issues are found, Shopify notifies you.
  • You fix the issues and resubmit.
  • Each review and resubmission cycle adds another one to two weeks.

If you have issues flagged repeatedly, you’re looking at months of back-and-forth, so the key is to minimise the chances of getting rejected in the first place. Here are the best practices we learned to minimise the risk of your app being declined:

  • Verify you’re using the latest APIs. This is essential. In the few months it took us to develop the app, one of the critical APIs for payment apps was deprecated. Normally Shopify gives developers a year’s notice, but exceptions happen. Before your final submission, double-check that every API you’re using is current and supported.
  • Record your app flow in all currently supported browsers. Shopify requires video recordings demonstrating the entire flow on all seven browsers it supports – https://help.shopify.com/en/manual/shopify-admin/supported-browsers . Testing just one or two isn’t enough – the recordings prove your app works across all environments. Don’t forget to upload the video to google drive (public link access) and include them with your submission.
  • Use plain, factual language in your application. When you submit your payment app, you’ll need to fill in an extensive application form. This isn’t the place for promotional language or subjective claims like “this is the best app in the world.” Stick to straightforward, factual descriptions of what your app does and how it works. Be thorough and avoid marketing speak.
  • Ensure screenshots contain no personally identifiable information (PII). Any images you include in your app listing must not show real names, card details or any other personal data. Even if you think it makes the screenshot more realistic or helpful for merchants, Shopify won’t approve it. Mask or remove all PII before submission.

Realistic Timeline Expectations

If you’re planning to build a Shopify payment app, here’s what you should realistically expect in terms of timelines:

Development: three to six months, depending on the complexity of your payment solution.

App approval: an additional one to two months, depending on how smoothly the review process goes and how many rounds of feedback you need to address.

Logo approval: four to eight weeks. Start this process while development is underway to avoid delays.

When you factor in all these stages, a payment app project can easily take six to nine months from start to finish. Plan for these timelines from the outset, especially if you have stakeholders or clients expecting quicker turnarounds.

By planning carefully, setting expectations early, and learning from the experiences we at Autify – and doubtless many other developers – have had, you’ll give your payment app the best chance of a smooth and stress-free launch.

Pre-Launch Checklist

Before you hit submit, follow our handy checklist to make sure you’ve covered every critical step

  • Verify you’re using the latest Shopify APIs.
  • Record your app flow in all supported browsers: Google Chrome, Mozilla Firefox, Apple Safari (macOS/iOS), Microsoft Edge, Opera, and Google Chrome for Android.
  • Include video recordings with your app submission to demonstrate functionality across all environments.
  • Use plain, factual language in your app’s documentation and submission forms. Avoid marketing claims.
  • Ensure all screenshots and sample data contain no personally identifiable information.
  • Start the logo approval process while development is underway to avoid launch delays.

At Autify, we’ve navigated these challenges firsthand while building payment apps for clients in the UK. If you need support, get in touch or email us at info@autify.co.uk – we’re here to help. Good luck with your Shopify payment app project – here’s to a smooth review and a successful launch!

Maintaining Data Quality in your EPoS

For many businesses, their Electronic Points of Sale (EPoS) can be a key aspect of their operations containing lots of important and sensitive data. However, with multiple employees accessing and editing this data, it can quickly become disorganised and confusing. Therefore, maintaining data quality is essential for ensuring seamless operations.  

But what does data quality mean? Data quality ensures that the information within a system is accurate, complete, consistent, timely, and unique. 

Let’s consider these five areas and how they relate to your EPoS system: 

Accuracy  

Accuracy is used to measure if the data represents the real-world scenarios or events,  ensuring every value is plausible. This is important because accurate data ensures that real-world operations can proceed as planned or expected. 

For example, this may include ensuring that only the correct products are available for purchase within the EPoS system. In Pursuit, a leading EPoS solution, this is achieved by assigning the appropriate product status – Current, Discontinued or Archived. These statuses can be used to clarify the following information: 


Current, Discontinued and Archived stock controls in Pursuit system


  • Current – The product is available and can be purchased. 
  • Discontinued – The product is no longer supplied, but existing stock can be sold on sale.    
  • Archived – The product is out of stock and unlikely to ever be back in stock. 

This ensures that the available products match those physically in stock, reducing errors such as overselling discontinued or archived items. 

Completeness 

Data completeness ensures that all essential information is present. When considering this, it is important to note that this does not require 100% of your fields to be filled but rather those critical to the system. Therefore, it’s crucial to determine which fields are essential and which are optional. 

Within an EPoS environment, this can be implemented by ensuring necessary product fields are correctly filled out. These fields usually include: 

  • StockFor stock, it’s important to ensure that it is added to the correct branch and stock field. These stock fields typically consist of available stock, purchase order stock, stock in transit for customer delivery, and many others. This ensures that the correct products are available for purchase. 
  • PricesIt’s also critical to set price fields. These fields allow you to set not only the main product price but a sale price as well. Therefore, ensuring that the correct price is displayed when a customer makes a purchase.  
  • Supplier – It can also be beneficial to set Supplier fields because this clarifies which supplier product stock needs to be ordered from. This, therefore, makes it quicker for needed stock to be requested during the purchasing process. 
  • Descriptions – Setting descriptions for Products within your EPoS can be helpful. This allows you to provide a product synopsise to inform customers and employees quickly. Helping all to get an understanding of the product quickly
  • Properties – Key properties such as Product Type, Brand or Material are helpful to be set. This provides extra information to your customers and employees, allowing all parties to understand better


List of properties in Pursuit system


By completing these fields, businesses can centralise product information, reducing miscommunication and operational errors. 

Consistency  

Data consistency ensures that values do not conflict or duplicate across the system. This is crucial for eliminating confusion and enhancing usability. 

For example, standardising product SKUs prevents duplication and makes it easier to search for products. At Autify, we recommend using a structured format based on the sector, department, and group. For example, an Omega Seamaster Aqua Terra watch might follow this SKU format: 

  • Sector = Watch 
  • Department = Omega 
  • Group = Seamaster 
  • Final SKU = WATC-OMEG-SEAM-00003705 

Adopting this format ensures that all your SKUs are consistent and well-structured, making it easier for employees to understand and work with the system efficiently. 

Timelessness 

Timelessness data means that it is available when expected or needed. This allows businesses to respond quickly to changes in demand, stock levels, and customer needs, enhancing operational efficiency, customer satisfaction, and profitability. 

Timelessness is particularly important when corresponding with product stock within an EPoS system. Incorrect stock data can lead to orders being placed that cannot be fulfilled, disrupting operations and frustrating customers. To resolve this issue, Autify have developed integrations between EPoS system, Pursuit, and Content Management Systems (CMS) like Shopify, WordPress and Magento 2. This integration automatically updates stock levels when an order is placed on your website, minimising stock errors and improving operational efficiency  

This principle also applies to other business management tools like Enterprise Resource Planning (ERP) systems, which help organisations manage internal processes. This is because incorrect purchasing or manufacturing managed by these systems can lead to disorganisation and a decline in customer satisfaction. Autify also offers integrations between ERP systems like MD 365 Business Central and CMS platforms such as Shopify, BigCommerce, and Magento 2. These integrations provide enhanced visibility across business operations & ensure precise stock control.   

If these solutions could benefit your business, contact our team today to learn more. 

Validity 

Validity ensures that data conforms to an expected format or range, making it usable across many different systems. 

For example, this should be considered when thinking about image sizes & character limits: 

  • Image Sizes – Large product image files can slow down EPoS systems and other systems connected to it like websites. At Autify, we recommend keeping image sizes between 100-200KB in order to optimise both system performance and load times. 
  • Character Limits – Fields like Product Name should adhere to character limits so that consistency is maintained across all platforms. 


Maintaining data quality in your EPoS system is crucial for ensuring smooth operations, minimising errors, and delivering an enhanced customer experience. By prioritising accuracy, completeness, consistency, timeliness, and validity, your EPoS system can serve as a reliable foundation for your business. While this blog provides a starting point for implementing data quality within your EPoS system, if you require further assistance or information, please don’t hesitate to contact our team! 

How to Get REST API Credentials from the Developer Portal for your AIB MS AuthiPay Payment Gateway

Are you looking to learn how to obtain a REST API Key and Secret credentials for your AIB MS AuthiPay payment gateway? Well, you’re in the right place!  

In this guide, we explain the steps to take to get the credentials you need from the Fiserv Developer Portal, link them to your AIB MS AuthiPay account and integrate them with your website. In the end, you’ll be ready to unlock powerful functions, such as security features and refund processing. 

So, let’s get started…  

Step 1: Access the Fiserv Developer Portal 

To begin the retrieval of your REST API credentials, you will need to navigate to the Fiserv Developer Portal: https://fiserv.dev/ 

From the homepage, please click the button to “Sign up” at the top of the page. Alternatively, you can go directly to the sign up page here: https://portal.fiserv.dev/user/registration  

Homepage of Fiserv’s Developer Portal


Step 2: Sign Up for an Account  

Next, you will need to register for an account with Fiserv. Please complete the sign up form by providing accurate details including your name, company, job title and email address.  

For the field with a drop down list, please select the “merchant” option. 

Register

Once you have filled all your details, you can click “ Register” button. You will then receive an activation email to address you have used to register your account. In this email, there will be instructions on how to activate your account, which when followed, will open an activation page.  

You will then receive a second email that contains a verification code. You will see a field on the activation page for this code, so please enter the code here.  

Thank you for registering email

You will also be asked to create a new password and set preferences for the language and currency. In the currency field, please choose GBP. This selection will not impact your online store, and other currencies can be set in your payment gateway.   

Please finish this step by navigating through the remaining fields, such as providing an optional mobile number and consent choices. Once done, please click continue. 

Create a password


Step 3: Finish Setting Up Your Account   

The final steps of the account set up are for added security. We recommend that you enable two-factor authentication on your account, with the “one-time password via email” option. 

Choose a security method 

Once done, you will see a notification that your account has been set up successfully, and will be prompted to sign in once more. Please do this.

Security method successfully added

Once you’ve reached this page, you will need to log in again with your details, and you will be navigated to see the option to request an API Key. 

Step 4: Request Your REST API Credentials 

Now you are in your account, you can request your REST API credentials. Go to the “Request API Key” page and choose the “standard” tab. On this page, you will see an option to “create new key”, please select this.  

Request an API Key 

On the pop up that appears, there will be a few options to select before saving your key. Firstly, choose between the sandbox or production options, depending on whether you are creating a key for a test or live environment.   

Please also input a relevant and identifiable name for your new key.  

Create Standard Key

You have now generated your new REST API key. On the screen, the key will now appear in a list – please click the key to see its details, including the Secret Key.  

View API details and Secret Key

Link Your API Key and Store

Now that your REST API key is created, you cam ask Fiserv to link it to your merchant store.  

Sandbox (Test) Environments

Please send an email to authipay@aibms.com with the below information:  

  • API key name 
  • Store ID (please ensure this is the ID of the store you would like to link) 
  • Email address used to create the account 

Once linked, your sandbox environment and features will be ready to use.  

Production (Live) Environments 

For production environments, the API key and API secret will not be received straight away. Once ready, please send an email to authipay@aibms.com with the below information:  

  • API key name 
  • Store ID (please ensure this is the ID of the store you would like to link) 
  • Email address used to create the account 

Once linked, your production environment and features will be ready to use.  

Please note, merchants are required to send the email to the AIB MS AuthiPay Fiserv mailbox, NOT third-parties on their behalf. 

Refunds

To be able to issue refunds, you will also need to notify Fiserv to connect your store ID and REST API key.  

You can use the below email template, but please be sure to include your relevant details. Please send the email to authipay@aibms.com  

“Hi Fiserv team,  

Can you please link the below STORE ID with the REST API Key?  

  • Store ID:  
  • Email Address:  
  • Key Name:  

Can you please confirm once this is done?  

Thanks  

SENDER_NAME”

How to Configure the New REST API in Your WordPress Dashboard

Once you have received your REST API Key and Secret, you are ready to integrate them with your WordPress website. To do this, please follow the below steps:

  1. Log into your WordPress dashboard as the administrator  
  2. In the menu on the left, navigate to WooCommerce >> Settings >> Payments  
  3. Click “Manage” under the Payments section to access the AuthiPay Payment Gateway plugin  
  4. Locate  the New REST API tab. This is where you can input the API Key and Secret from your Fiserv account 

How to Configure the New REST API in Your Magento Dashboard

Once you have received your REST API Key and Secret, you are ready to integrate them with your Magento website. To do this, please follow the below steps: 

  1. Log into your Magento dashboard as the administrator  
  2. In the menu on the left, navigate to Sales >> Payment Methods >> Autify Digital >> AuthiPay Payment 
  3. Input the API Key and Secret from your Fiserv account 
  4. Click the “Save” button  

How to Configure the New REST API in Your Prestashop Dashboard

Once you have received your REST API Key and Secret, you are ready to integrate them with your Prestashop website. To do this, please follow the below steps:

  1. Log into your Prestashop dashboard as the administrator
  2. In the menu on the left, navigate to  AuthiPay Payment >> Configurations
  3. Input the API Key and Secret from your Fiserv account
  4. Click the “Save” button

Conclusion 

Your REST API key, website and AIB MS AuthiPay integration are now successfully linked, and you’re ready to leverage the full potential of your payment gateway!  

If you require any further support, please do not hesitate to contact us 

How to choose the payment gateway for your E-commerce

With multiple options available at various prices and benefits, choosing the right payment gateway for your e-commerce can feel an exhausting process.

While some payment gateways are good options for all businesses, there are some integrations which inspire more trust, while some others are better suited if you have a physical shop too, or can be customised. Some integrations can boost your conversions and drive revenue growth, while a wrong, poorly performing payment integration can harm your business and its reputation by discouraging potential clients.

How to choose the best payment integration for your e-commerce?

To ensure a long-term and sustainable investment for your business, it is important to take the right decision when choosing the best payment integration for your online store, no matter your e-commerce platform.

With this blog we want to share our knowledge and experience in a short guide for choosing and setting up the right payment gateways on your e-commerce website. We will guide through how a payment gateway works and what minimal requirements to expect from a well-performing payment integration, so that at the end of this article you can be ready to make an informed decision.

If you continue reading, you will find:

What is a payment gateway? 

Online purchase as two hands coming out from two facing monitors: one with a credit card, one with the shop bag.

A payment gateway is an online third-party service designed for merchants that is integrated in your website to handle payment authorisation and processing. Applied to the concept of an e-commerce website, a payment gateway allows it to accept and process payments. 

Payment gateways can differ in features and functionality, but they are usually used for payments with credit or debit cards, as well as bank transfers and direct payments.  

They facilitate the transfer of information between the payment device or portal i.e. a mobile phone or a website and the front-end processor, such as a bank.  

A payment gateway works as a bridge between you and the customer. It handles your customer’s credit card numbers, expiration date and personal information of each transaction without you having to think about it. All you need is just to have a merchant account to link with the payment gateway in your e-commerce platform. It also acts as the bridge between your online store and financial institutions/payment processors, enabling the secure processing of online payments.  

Acting as an intermediary between e-commerce sites and payment processors, the payment gateway ensures the card is legitimate, encrypts and transmits payment data, and facilitates the authorising/declining of transactions. 

Payment gateway reports if the card has been approved or not, and it deducts the amount from your customer’s bank to the store account in case of a successful transaction. 

All the transactions processed by the payment method will be routed to your merchant account automatically. 

There are two different types of payment gateways available for an e-commerce platform: 

  • Direct: it allows customers to complete the transaction directly on your website. With this option, you are responsible for handling your customers’ personal and credit card information, however you shorten the checkout process. 
  • Redirect: it redirects customers to the payment processor’s website for the transaction, making them leave your website. It’s a good option for small businesses as it combines the convenience and the security of the external platform, but requires additional steps for the customers, and less control for the merchant.  

When dealing with an international online shop, your payment gateway must be able to accept multi-currency transactions from your country and from your customers’ country of origin, without any conflict. The best way to handle this is by testing, eventually mix and matching your gateways. 

How does a payment gateway work? 

Person performing an online payment with a credit card

Practically talking, your e-commerce website needs a merchant account and a payment gateway to accept payment online. 

Usually, you can count on a Payment Service Provider (PSP) to get both, avoiding the big headache of finding a solution yourself, and it is common to use the term “payment gateway” referring to any solution that integrates the services offered by a PSP. 

Most payment gateways available online cover the services offered by a PSP, so now we use payment gateway as a synonym for an e-commerce payment integration that offers the services of a PSP. 

When operating in your online store, a payment gateway performs several operations helping your customers to perform their payment, and your business to register it, returning a receipt and a confirmation.  

  1. First, it passes the payment through the store’s server, transfers it from the payment portal to the issuing bank and asks for the confirmation. 
  1. Depending on the bank’s response, the request can be accepted or rejected, with a ping to the payment gateway through the merchant server that allows or blocks the purchase.  

This can sound long and complex, and practically it is. However, a good payment gateway allows these operations to happen within the matter of a few seconds, with a small probability bad user experience.  

The type of payment gateways how they respond, and their security has a major impact on the way your customers experience and perceive your business, and this is why the choice of a payment gateways is among the most important business decisions the store owners can make.  

What are the benefits of a payment gateway for your business 

When selecting a payment gateway, understanding the benefits it offers is crucial. A payment gateway is more than just a tool for processing payments— it is a cornerstone of a seamless, secure, and user-friendly online transaction experience. Here are some key benefits to consider:

1. Secure Transactions

Good payment gateways employ advanced encryption techniques and comply with industry standards like PCI-DSS (Payment Card Industry Data Security Standard) to ensure the protection of sensitive customer data. This security layer not only safeguards your business from potential fraud but also builds trust with your customers, encouraging them to complete transactions without hesitation. 

2. Enhance the Customer Experience

Payment gateways streamline the checkout process, making it quick and convenient for customers to complete their purchases. Features like one-click payments, saved payment details, and smooth mobile integration contribute to a frictionless experience. A positive checkout experience can lead to higher customer satisfaction and repeat business, and can increase the number of sales.  

3. Automated Payment Processing

With a payment gateway, transactions are processed automatically, reducing the need for manual intervention. This not only speeds up the payment process but also minimises errors, ensuring that payments are accurately and promptly credited to your account.  

4. Comprehensive Reporting and Analytics

Many payment gateways provide detailed reports and analytics on your transactions. These insights can help you track sales performance, identify trends, and make data-driven decisions to optimise your payment process.  

5. Scalability

As your business grows, your payment processing needs will evolve. A robust payment gateway can scale with your business, handling an increasing volume of transactions without compromising on performance or security. This scalability ensures that your payment infrastructure can support your growth, whether you’re expanding into new markets or launching new products. 

6. Integration Capabilities

Payment gateways often integrate seamlessly with other business systems, such as e-commerce platforms, accounting software, and CRM systems. This integration simplifies operations by ensuring that all payment-related data is synchronised across your business tools, reducing the risk of discrepancies and enhancing overall efficiency. 

Struggling to choose the right payment gateway? The perfect fit can boost sales, streamline transactions, and build customer trust, but with so many options, it’s tough to decide. Let our experts guide you through the key factors to find the best solution for your needs. Contact us today and make the right choice for your business!

By understanding these benefits, you can make an informed decision when choosing a payment gateway, that aligns with your business goals and customer needs. 

Fortunately, there are several great options that can integrate well with your e-commerce and provide a great experience for your business and your customers.  

How to choose the right payment gateway for your business: what to consider

Choosing the right payment gateway is a serious matter for your business, as it should align with your business model, transaction volume, your target audience and your product and services. 

The decision will impact the efficiency of your transactions, but also the customer experience and their own satisfaction. 

Below, we share some important factors we advise you to consider when choosing the payment gateway for your business: 

Platform integration

Ecommerce cart printed on a white keyboard

This first and most important thing you need to check when considering a payment gateway, is making sure that it is available in your e-commerce store, it works well on it (and so it has a good reputation online), it is easy to install, to configure and to maintain.  

It is also important to evaluate the time needed to onboard and implement the gateway, factors which also impact the financial resources necessary to set it up and make it operative.  

Target market

Nowadays there are hundreds of physical and online purchase channels all over the world, from the large circuits including Visa, MasterCard, Google Pay and Apple Pay, to systems that are spread in specific geographic regions. When choosing the right payment gateway for your business, always consider the location and the habits of the audience you want to reach.  

Cost

When choosing a payment gateway, cost is a crucial factor to consider. Some gateways charge a monthly fee, while others may only charge for the transactions you process. It’s essential to evaluate your business model and transaction volume to determine the most cost-effective option. If you’re just starting out or have a smaller business, you might prefer a gateway that doesn’t require a high monthly fee but instead charges per transaction. Conversely, if you have a high transaction volume, a gateway with a flat monthly fee could save you money in the long run. 

Transaction Fee 

Transaction fees can vary significantly between payment gateways, and this can impact your profit margins. These fees are typically a percentage of each transaction plus a fixed amount. Some gateways might offer lower fees if your sales volume is higher, making it crucial to consider your current and projected income when choosing a gateway. 

Understanding these costs upfront will help you avoid any unpleasant surprises and ensure that your payment processing remains within your budget. 

Fraud Protection

Fraud protection is vital for safeguarding your business against unauthorised transactions, especially with the increasing prevalence of online payment fraud. A robust fraud protection system in your payment gateway can protect you from chargebacks and disputes related to stolen or cloned credit cards. Look for gateways that offer advanced security features, such as encryption, tokenisation, second factor authentication and real-time fraud monitoring, to keep your transactions secure and your business reputation intact. 

Support and Customer Service

Reliable customer service is essential when dealing with payment processing, as any issues with your gateway can directly impact your sales. Ensure that the gateway you choose offers 24/7 customer support with experienced agents who can help resolve problems quickly and efficiently. This support can be crucial in maintaining seamless operations, especially during peak business hours. 

Functionality

When evaluating the functionality of a payment gateway, consider the following aspects: 

1. Digital Payments

The ability to accept digital payments is increasingly important as customers become more accustomed to using mobile wallets and other alternative payment methods. Ensure that the payment gateway supports popular options like Apple Pay, Google Pay, and PayPal. These payment methods not only offer convenience but also add an extra layer of security through features like two-factor authentication (2FA), which can help build trust with your customers. 

2. Express Checkout

Express checkout options can significantly enhance the user experience by allowing customers to complete purchases quickly. If your business supports express checkout directly from the Product Detail Page (PDP), ensure that your payment gateway can integrate seamlessly with this feature. However, the availability of express checkout may depend on your specific business restrictions and needs, so consider whether this functionality aligns with your customer journey. 

3. PCI Compliance

PCI compliance is a critical requirement for businesses that handle credit card transactions. Ensure that your payment gateway complies with the Payment Card Industry Data Security Standard (PCI DSS), which is designed to protect cardholder data during transactions. This compliance not only safeguards your business from potential security breaches but also helps you avoid hefty fines associated with non-compliance. 

4. Needs of Your Physical Store

Person paying with his phone on a physical store.

If your business operates both online and through a physical store, it’s important to choose a payment gateway that can handle both environments seamlessly. Look for gateways that offer card machines and support for in-store payments, ensuring consistency across all your sales channels. Additionally, consider how the cost of integrating a unified system for both online and offline transactions will impact your overall budget. 

5. Hosted Gateway (for Small Businesses)

A hosted gateway can be a great option for small businesses that need a simple, cost-effective solution. With a hosted gateway, the payment processing is handled entirely by the gateway provider, reducing the burden of security and compliance on your end. This setup is particularly useful for businesses with lower transaction volumes or those looking to minimise technical complexities. 

6. Refunds from the Backend

The ability to process refunds directly from the backend of your e-commerce is an important feature to consider. This functionality simplifies customer service and helps maintain a smooth user experience. Make sure the payment gateway you choose offers easy-to-use refund processing tools that can be managed from your business’ admin dashboard. 

7. Flexibility and Customisation

The flexibility and customisation options offered by a payment gateway can make a significant difference in how well it integrates with your business processes. Consider whether the gateway allows you to customise the checkout experience to align it with your brand and customer expectations. A flexible payment gateway can adapt to your evolving business needs, offering features like custom payment flows, multi-currency support, and integration with other business tools you use. 

Which payment gateway will you choose?

Choosing the right payment gateway to integrate into your e-commerce is an important step for your company.  

Take some time and carefully evaluate your choices. Understand your business’s current online payment requirements and anticipate how these might change as you grow.  

For any questions contact info@autify.co.uk or +44 0115 778 6950. We are happy to help you find the best payment gateway for your business!  

Getting REST API Credentials from the Developer Portal for your Clover Payment Gateway

In this guide, we walk you through the steps to retrieve REST API keys and credentials for your Clover Payment Gateway integration.  

With the REST API credentials linked to your online store, you will be able to unlock powerful capabilities such as security features, refund processing and more.  

Follow the steps outlined below to get your REST API credentials from the Fiserv developer portal.  

Step 1: Navigate to the Fiserv Developer Portal  

The first step to retrieving your REST API credentials is to visit the Fiserv Developer Portal: https://fiserv.dev/ 

Then, click the sign up button at the top of the page, or navigate directly to the registration page through this link: https://portal.fiserv.dev/user/registration  

Homepage of Fiserv’s Developer Portal


Step 2: Create an Account 

Complete the sign up form, giving accurate details such as your name, company, job title and email address.  

In the dropdown menu, you should also select “merchant” from the list.  

Register

After submitting the sign up form, you will receive an activation email in the inbox of the provided address. Please open this email and “activate your account” by following the instructions provided in the message. An activation page will be opened.  

Following this, you will receive another email containing a verification code. On the activation page, please enter the verification code from the second email.  

Thank you for registering email

You will also be prompted to create a new password and set language and currency preferences. Please select GBP as the currency. This does not impact the currency used on your online store, and you will still be able to set your currency prefernces in the payment gateway.   

Complete the remaining fields, such as providing a mobile number (optional) and the consent tick boxes, and click continue.

Create a password


Step 3: Finish the Account Set Up    

To finish setting up your Fiserv account, we recommend enabling the two-factor authentication setting using the “one-time password via email” option

Choose a security method 

After you have followed the instructions to set this up, you will receive a confirmation that your account has been successfully set up and ready to use.

Security method successfully added

You will be prompted to login once again. Please proceed with this.  

Step 4: Request Your REST API Key

The final step is requesting your REST API key. In your account, navigate to the “Request an API Key” page. On this page, there will be two tabs – in the “standard” tab, please select “create new key”.  

Request an API Key 

A pop up will appear, where you will need to choose between a Sandbox or Production environment. Please select the sandbox option for test or development websites, and production for live environments.  

You will also need to choose an appropriate name for the Key. We advise using something relevant and descriptive so it can be easily identified.  

Create Standard Key

After completing these details, you can generate the API key. Click on the key you have just created in the list that is generated to view its details and to locate the Secret Key.    

View API details and Secret Key

Linking Your API Key and Store

Once you have created the REST API key, you will need to request that it is linked to your merchant store.  

Sandbox (Test) Environments

Please send an email to cloverukipgconnect@fiserv.com with the below information:  

  • API key name 
  • Store ID (please ensure this is the ID of the store you would like to link) 
  • Email address used to create the account 

Once linked, your sandbox environment and features will be ready to use.  

Production (Live) Environments 

For production environments, the API key and API secret will not be received straight away. Once ready, please send an email to cloverukipgconnect@fiserv.com with the below information:  

  • API key name 
  • Store ID (please ensure this is the ID of the store you would like to link) 
  • Email address used to create the account

Once linked, your production environment and features will be ready to use.  

Please note, merchants are required to send the email to the Clover Gateway Fiserv mailbox, NOT third-parties on their behalf. 

Payment.JS

If you will be using the Payment.JS payment method, you will also need to share the below webhook URL with Fiserv to link the account.   

Magento: https://example.com/clover/paymentjs/webhook   

WooCommerce: https://example.com/wc-api/clover-paymentjs-webhook  

Please ensure ‘example.com’ is changed to the relevant domain. 

We recommend using an email template like the below:  

“Hi Fiserv team, 

Can you please link the below STORE ID with the REST API Key and Payment.JS webhook URL?   

  • Store ID:   
  • Email Address:   
  • Key Name:   
  • Webhook URL: 

Can you please disable CVV verification and confirm once this is done? 

Thanks   

SENDER_NAME” 

Refunds

In order to issue refunds when using the redirect payment solution, you will also need to notify Fiserv to connect your store ID and REST API key.  

We recommend sending an email like the below, with your relevant details to cloverukipgconnect@fiserv.com  

“Hi Fiserv team,  

Can you please link the below STORE ID with the REST API Key?  

  • Store ID:  
  • Email Address:  
  • Key Name:

Can you please confirm once this is done?  

Thanks  

SENDER_NAME” 

How to Configure the New REST API in Your WordPress Dashboard

Once you have received your REST API Key and Secret, you are ready to integrate them with your WordPress website. To do this, please follow the below steps: 

  1. Log into your WordPress dashboard as the administrator  
  2. In the menu on the left, navigate to WooCommerce >> Settings >> Payments  
  3. Click “Manage” under the Payments section to access the Clover Payment Gateway plugin  
  4. Locate  the New REST API tab. This is where you can input the API Key and Secret from your Fiserv account 

How to Configure the New REST API in Your Magento Dashboard

Once you have received your REST API Key and Secret, you are ready to integrate them with your Magento website. To do this, please follow the below steps: 

  1. Log into your Magento dashboard as the administrator  
  2. In the menu on the left, navigate to Sales >> Payment Methods >> Autify Digital >> Clover 
  3. Input the API Key and Secret from your Fiserv account 
  4. Click the “Save” button  

Conclusion 

You have now successfully retrieved your REST API credentials and linked them to your Clover Payment Gateway integration and website. You are ready to unlock the full potential of your payment gateway and benefit from all its features and functions.  

If you require any further support, please do not hesitate to contact us 

Lloyds Cardnet Connect Setup: How to Get REST API Credentials from the Developer Portal

So, we hear you’re wanting to explore Lloyds Cardnet’s new REST API?  

Well, we’re one step ahead and already prepared a comprehensive guide to help you navigate through the process of obtaining your REST API credentials from Fiserv’s developer portal.  

With these credentials, you’ll be able to access and utilise the powerful features of the REST API fields. 

So, without further ado, let’s dive in. 

Step 1: Visit Fiserv’s Developer Portal 

Begin by visiting the Fiserv’s Developer Portal through this link: https://fiserv.dev/ 

Once you’ve arrived on the homepage, you’ll find the sign-up button on the top right-hand side.  

Homepage of Fiserv’s Developer Portal

Alternatively, you can dive straight in by clicking here 

Step 2: Register and Set Up Your Account  

Next,  

Get started by registering on the sign-up page: 

  • Enter your desired Username 
  • Provide your First Name 
  • Input your Last Name 
  • Select “merchant” from the dropdown menu 
  • Specify your Company 
  • Enter your Job Title 
  • Input your Email Address 

Register

Once registered, you will receive an activation email in your inbox. Select “Activate your account” and you will shortly receive another email with a verification code. 

Thank you for registering email

Enter the verification code provided in the email on the activation page. Ensure to make a note of your username and create a new password for logging in. 

Create a password

Select your preferred language, and select EUR as currency (this will have no effect on the transaction, even if your site uses GBP. You will be able to define GBP as your currency in your request for the gateway). Include your mobile number if you wish. Accept the Terms and Conditions check box and select continue. If any of the steps are missed, you will not see the continue box. 

Setup 3: Setting Up Multi-Factor Authentication and Logging In  

You can now set up multi-factor authentication. We encourage using the one-time password via email. 

Choose a security method 

Once you’ve made your selection, select “Continue”. Once you have successfully created your account, you can select continue again. You will shortly be notified that your account is ready, and you can proceed.  

Security method successfully added

Once you’ve reached this page, you will need to log in again with your details, and you will be navigated to see the option to request an API Key. 

Request an API Key 

Step 4: Requesting Your Rest API Key 

You’ve now reached the final step which is requesting your new REST API Key. 

Best Practices for API Key and Webhook Management (PaymentJS and/or Refunds):

To ensure smooth configuration, testing, and deployment, we recommend setting up three API keys on the Fiserv portal — one sandbox and two production keys.
  • Sandbox API Key – Use this key on your staging website with test credentials and the staging webhook URL. This allows you to validate the integration in a safe test environment.
  • First Production API Key – Once testing with the sandbox key is successful, use this key on the staging website with live credentials and the staging webhook URL to confirm that the live flow works as expected.
  • Second Production API Key – After successful staging validation, deploy to the live website using live credentials, the second production API key, and the live webhook URL.
Note: We recommend completing all these linkings together to prevent configuration delays and ensure a seamless go-live process. The first production key (linked to the staging webhook URL) can be deactivated once the testing flow is complete, as keeping unused keys active may pose a potential security risk. You can safely delete any unused production keys from the Fiserv portal (there’s no need to remove the sandbox keys


From the Homepage, select “Request an API Key.” In the Standard Tab, select “Create New Key.” 

  • Choose Sandbox or Production 
  • Name the key appropriately 

Create Standard Key

Once your API Key has been generated, you can click on it to view your API details and the Secret key. 

View API details and Secret Key

Important Notes for Sandbox and Production 

Sandbox (Test) 

Once retrieving your API Secret and Key for Sandbox, ensure that you email cardnetipg@fiserv.com. You will need to provide them with:  

  • Api key name 
  • Store ID you want linked 
  • Your account’s email address 

Once the linkage is complete, you can begin using your Sandbox Rest API Key and Secret.  

Production (Live) 

For Production, you will not receive your API Secret and Key right away. Email cardnetipg@fiserv.com with: 

  • Api key name 
  • Store ID you want linked 
  • Your account’s email address 

Once the linkage is complete, you can then begin using your Product Rest API Key and Secret. 

Please note that the MERCHANT is required to send the email to the Lloyds Cardnet mailbox, NOT a third-party on your behalf.  

Payment.JS

If you have activated the Payment.JS embedded payment method, you will also need to share the below URL with Fiserv in order to link the account.

Magento: https://example.com/lloyds/paymentjs/webhook

WooCommerce: https://example.com/wc-api/lloyds-paymentjs-webhook

Prestashop: https://example.com/module/lloydscardnetpayment/posttoken

Please note: ‘example.com’ will need to be changed to the relevant domain.

We recommend using an email template like the below:

“Hi Fiserv team,

Can you please link the below STORE ID with the REST API Key and Payment.JS webhook URL?

  • Store ID:
  • Email Address:
  • Key Name:
  • Webhook URL:

Can you please disable CVV verification and confirm once this is done?

Thanks

SENDER_NAME”

Refunds

If you are using the redirect payment solution and would like to be able to issue refunds, you will also need to ask Fiserv to connect your store ID and REST API key.

We recommend sending an email like the below, with your relevant details to cardnetipg@fiserv.com.

“Hi Fiserv team,

Can you please link the below STORE ID with the REST API Key?

  • Store ID:
  • Email Address:
  • Key Name:

Can you please confirm once this is done?

Thanks

SENDER_NAME”

Setting Up the New REST API in your WordPress Dashboard 

After obtaining your account’s REST API Secret and Key, follow these steps to integrate them into your WordPress site’s dashboard: 

  1. Log in to your WordPress dashboard as the administrator 
  2. Navigate to WooCommerce >> Settings >> Payments
  3. Click the “Manage” button under the Payments section to access the Lloyds Cardnet Payment
  4. Look for the New REST API tab, where you can input the API Key and Secret obtained from your Fiserv account 

Setting Up the New REST API in Your Magento Dashboard 

After obtaining your account’s REST API Secret and Key, follow these steps to integrate them into your Magento site’s dashboard: 

  1. Log in to your Magento dashboard as the administrator 
  2. Navigate to Sales >> Payment Methods >> Autify Digital >> Lloyds Cardnet
  3. Add the REST API Key and API Secret from your Fiserv account  
  4. Click on Save 

Setting Up the New REST API in Your Prestashop Dashboard 

After obtaining your account’s REST API Secret and Key, follow these steps to integrate them into your Prestashop site’s dashboard:

  1. Log in to your Prestashop dashboard as the administrator
  2. In the left side menu, navigate to Lloyds Cardnet >> Configurations
  3. Add the REST API Key and API Secret from your Fiserv account into the relevant fields
  4. Click on Save

Conclusion 

Hooray! You’ve successfully obtained your REST API credentials and are ready to unleash their power. 

Should you have any questions or require assistance, don’t hesitate to contact us. We’re here to help! 

8 Cyber Security Essentials for SMEs in 2024

Every day, businesses find new ways to leverage digital technologies for greater convenience, continuity and productivity. If we thought our operations couldn’t be more reliant on digital tools, we’re soon proven wrong with the endless innovations on offer.

But with technology so integrated into our day-to-day lives, you would think the risks would be better known. However, more than half of users don’t even know how to check if a password has been compromised, let alone prevent it from happening. And this is just one of the very many security concerns of operating a business.

Therefore, IT security should be considered an essential business practice. By implementing the right steps now, you can prevent dangerous breaches that could prove detrimental to your brand and business in the future. But with so many digital technologies to consider, SMEs and start-ups may be wondering where to start.

Well, here are eight security steps not to skip:

Protect passwords

Protect passwords

Passwords are often the first layer of security for your private information. Therefore, they should be carefully considered.

You have probably heard this time and time again, but passwords should not be easy to remember or re-used across sites and applications. One breach could leave data across platforms vulnerable, which could pose serious problems for a business with intellectual property or sensitive customer information.

Another thing to make a habit of is checking whether any accounts you hold have been compromised. You can use safe online tools, such as https://haveibeenpwned.com/, which keeps track of known security breaches. If any breach affects you, you can quickly react by updating passwords and notifying those impacted. Doing so can prevent any subsequent vulnerability, and assure stakeholders that you are taking proactive action in keeping your business and its information secure.

As a business, you likely hold many accounts with various platforms, sites and applications. Keeping track of passwords for these can become a burden, especially if they are being shared with different people in the company. Fortunately, there are password manager tools, such as Bitwarden or LastPass, that enable secure storage of multiple passwords, which can then be shared with users.

In the past, these tools have had a reputation for being difficult to use and tailored towards those more technically savvy. However, with increased security at the forefront of many people’s minds now, user experience has improved, making them suitable for general use, too.


Two-factor authentication

Implement two-factor authentication

Adding extra security layers with two-factor authentication is becoming more common, and in some cases, a requirement by certain platforms and tools. If it’s not something you’re familiar with, it’s time to get to know.

Two-factor authentication refers to a second step in the signing-in process, beyond just a username and password. There are various ways to verify a login attempt, whether that be a verification code sent to a connected email address or phone number, or a code stored in a dedicated authenticator app, such as those on offer from Microsoft or Google.

Some password managers also have built-in two-factor authenticator functionalities, whereby unique codes are created and valid for a few seconds, so need to be promptly inputted after signing in.

While the added security layer can slow down the logging-in process, it is an essential step, particularly for a business’s highly sensitive accounts, such as with banks or email providers. Any unauthorised activity on these can leave the company vulnerable to dangerous breaches.

For business owners, where there is sometimes an overlap between company and personal accounts, it is important that both are protected by this extra security step.


Email security tips

Email security tips

No matter your line of business, emails more than likely play a vital role in your day-to-day activities. It comes as no surprise then, that threats and scams are often targeted at a company’s emails, with attempts to access sensitive data, money or company information.

Email threats can come in many forms, but generally, they cause harm when dangerous links or attachments are opened. Unsafe emails can often be recognised pretty easily if you pay close attention to the details. For instance, the email address might not match the sender’s name or company, and often consists of a random, or long, sequence of letters and numbers.

The URLs in these emails also tend to be misleading. For instance, a link might read www.apple.com, but the actual URL it is linked to might be different. When URLs are hidden in this way, it is usually a telltale sign that is it harmful. You can check the URL of any link in an email by simply hovering over it.

Another common email threat is scammers impersonating the CEO of a company and sending employees emails asking them to do certain tasks, such as WhatsApp a number, or purchase gift cards. Again, the authenticity of these emails can be verified by checking the email address and any links. It’s also important to ensure employees who may be targeted by such scams are aware of the signs and risks.

Businesses should implement email security measures to help protect employees and prevent the chances of any scams being missed. For instance, a security layer that scans incoming external links and attachments for phishing attempts or viruses can identify and stop users from receiving harmful messages.


Device protection

Device protection

As a minimum, all businesses should have anti-virus software with internet security on all internet-accessible devices that contain company information or are used for business purposes.

However, simply having anti-virus protection isn’t enough to keep your business safe. With the amount of information that passes through our devices each day, there are even greater chances of threats. Therefore, it’s important to schedule weekly scans to keep on top of potential risks.

Not only do risks threaten sensitive company data, but dangers such as ransomware can cause significant disruption to your operations as they block access to systems until large sums of money are transferred to scammers.


Keep software updated

Keep software updated

To conduct our day-to-day activities, we often rely on a number of third-party solutions. Think about communication tools, such as Microsoft Teams and Zoom, to information sources, including Google Chrome and Bing.

Fortunately, these third-party tools come with the benefit of leading security teams who regularly update and improve their safety in response to new and potential cyber threats. All businesses really need to do is ensure their software is kept up to date with the latest releases and patches.

While this can sometimes feel like an inconvenience, paired with a short period of downtime, the risks of not updating pose far greater threats.

One way to keep on top of updates is to keep a list of all the software used in the business by IT Security personnel and monitor any zero-day vulnerabilities that could become harmful. This way, any urgent scans or patches can be applied before it’s too late, too.


Regularly back up data

Regularly back up data

As businesses, we are largely reliant upon the information and data we have stored. Therefore, it’s important to keep it regularly backed up to ensure business continuity should there be any disruption or breach.

Cloud-based services, such as One Drive and Google Drive are foolproof ways to ensure company files are backed up. However, as mentioned previously, these solutions are only beneficial if kept updated and protected by strong passwords and two-factor authentication layers.

For data that may not be updated automatically, we recommend taking a back up on a weekly basis, at least. Or, if a significant number of changes have been made in a day or shorter period of time, a back up may be necessary sooner.


Tips for remote working

Tips for remote working

Most SMEs and start-ups now operate with a remote working policy. Whether it’s yourself, or an employee, there are some important things to consider to ensure the business is protected wherever you are.

One thing you will probably need, no matter where, is internet access. The obvious solution is using WiFi networks where possible, however, publicly accessible networks can pose significant threats to your business, and are often targeted by hackers. Therefore, it’s recommended that you opt for your own personal hotspot, with a strong password instead. Of course, this might require more data allowance, which will come at a higher price, but the financial risk to your business when using an unsafe network could end up costing you much, much more.

For additional protection, you may also want to use a VPN, like NordVPN or ExpressVPN, with a dedicated IP address. This will help increase your online privacy, making it more difficult to be hacked, particularly when using a public or shared network. You can then add more layers of protection to your company’s website, or merchant centre for e-commerce workers, by hiding the admin address behind the dedicated IP.

If working in shared spaces, it’s also important to be wary of your surroundings. For instance, avoid opening sensitive or private company data where others are able to view it. And if leaving a laptop, phone, or any other device unattended for any amount of time, ensure it is locked and password protected.


Educate employees

No matter how big or small your team, each member should be educated on the steps you as a business, and they as employees should be taking to ensure protection across all activities, devices and software. These steps should include each of the above as a minimum, and any others that are specific to your business.

As well as ensuring the business is protected, it is also important to teach teams about personal cyber security as a breach of an individual’s account or device, could in-directly impact the business.


We’re sure you already have some cyber security measures in place. However, with the ever-evolving digital landscape, it’s important to keep up to date with new security features, as well as ensure multiple layers of protection for complete peace of mind. 

As a starting basis, the steps outlined in this blog will provide your business with adequate protection. However, if you would like to speak to our team about additional security steps for your specific business, please don’t hesitate to get in touch.

Contact

Get in Touch