

How to Get REST API Credentials from the Developer Portal for your AIB MS AuthiPay Payment Gateway

Are you looking to learn how to obtain a REST API Key and Secret credentials for your AIB MS AuthiPay payment gateway? Well, you’re in the right place!
In this guide, we explain the steps to take to get the credentials you need from the Fiserv Developer Portal, link them to your AIB MS AuthiPay account and integrate them with your website. In the end, you’ll be ready to unlock powerful functions, such as security features and refund processing.
So, let’s get started…
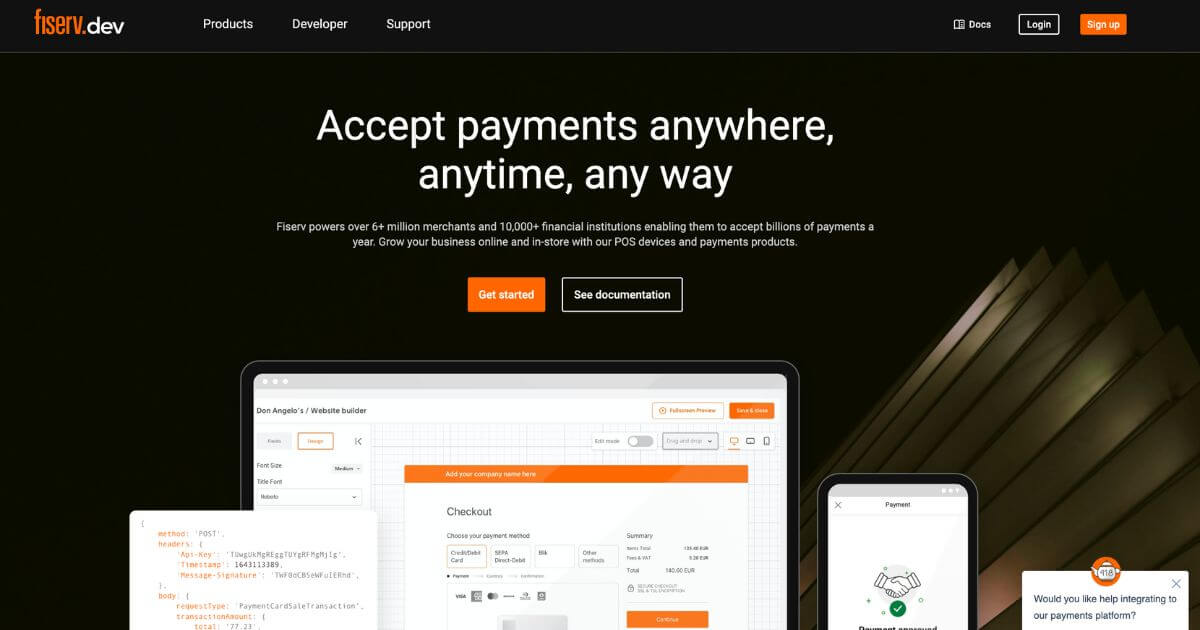
Step 1: Access the Fiserv Developer Portal
To begin the retrieval of your REST API credentials, you will need to navigate to the Fiserv Developer Portal: https://fiserv.dev/.
From the homepage, please click the button to “Sign up” at the top of the page. Alternatively, you can go directly to the sign up page here: https://portal.fiserv.dev/user/registration
Step 2: Sign Up for an Account
Next, you will need to register for an account with Fiserv. Please complete the sign up form by providing accurate details including your name, company, job title and email address.
For the field with a drop down list, please select the “merchant” option.
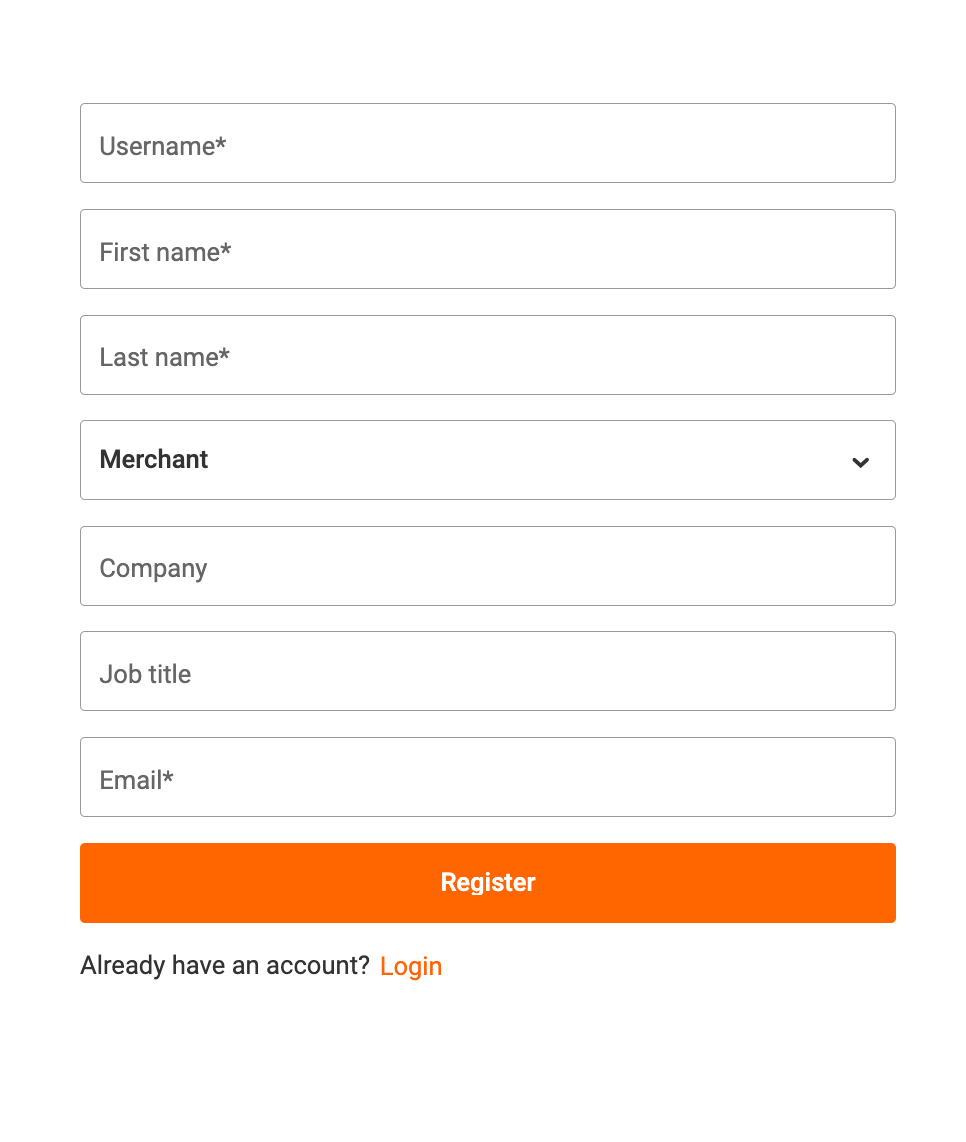
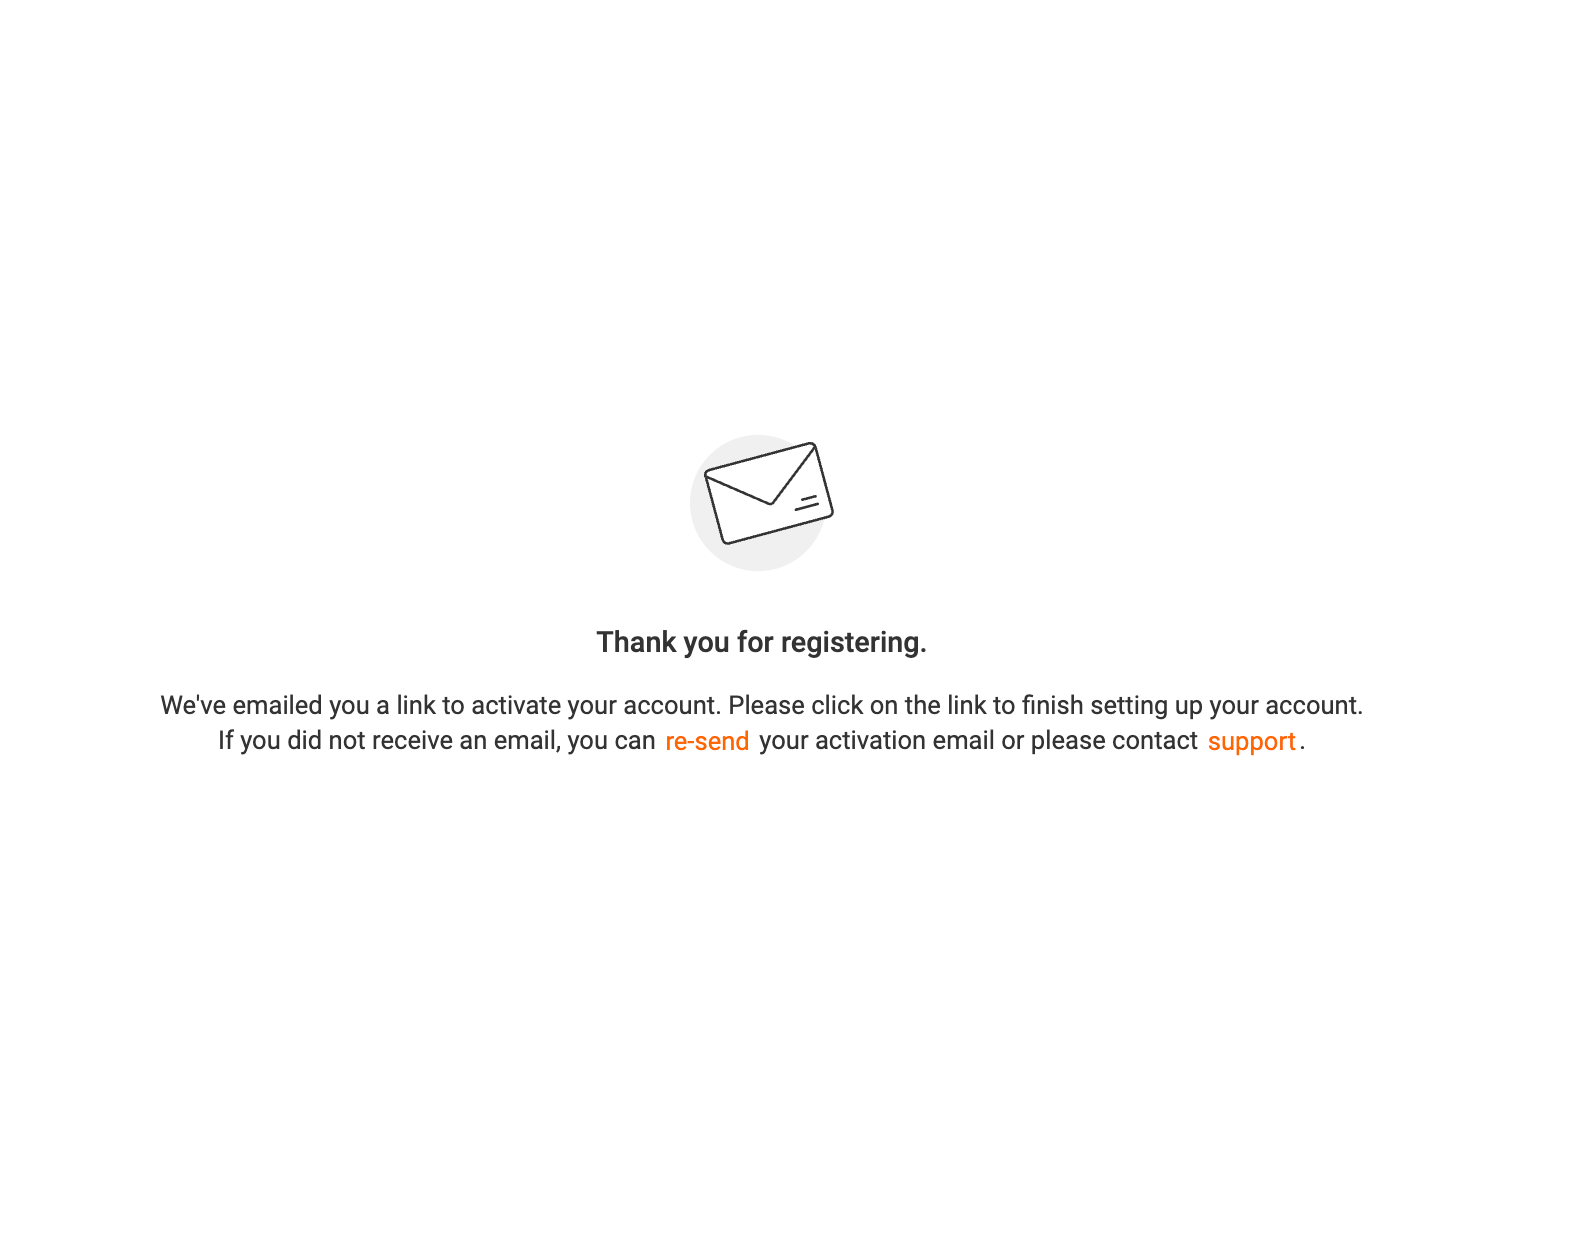
Once you have filled all your details, you can click “ Register” button. You will then receive an activation email to address you have used to register your account. In this email, there will be instructions on how to activate your account, which when followed, will open an activation page.
You will then receive a second email that contains a verification code. You will see a field on the activation page for this code, so please enter the code here.
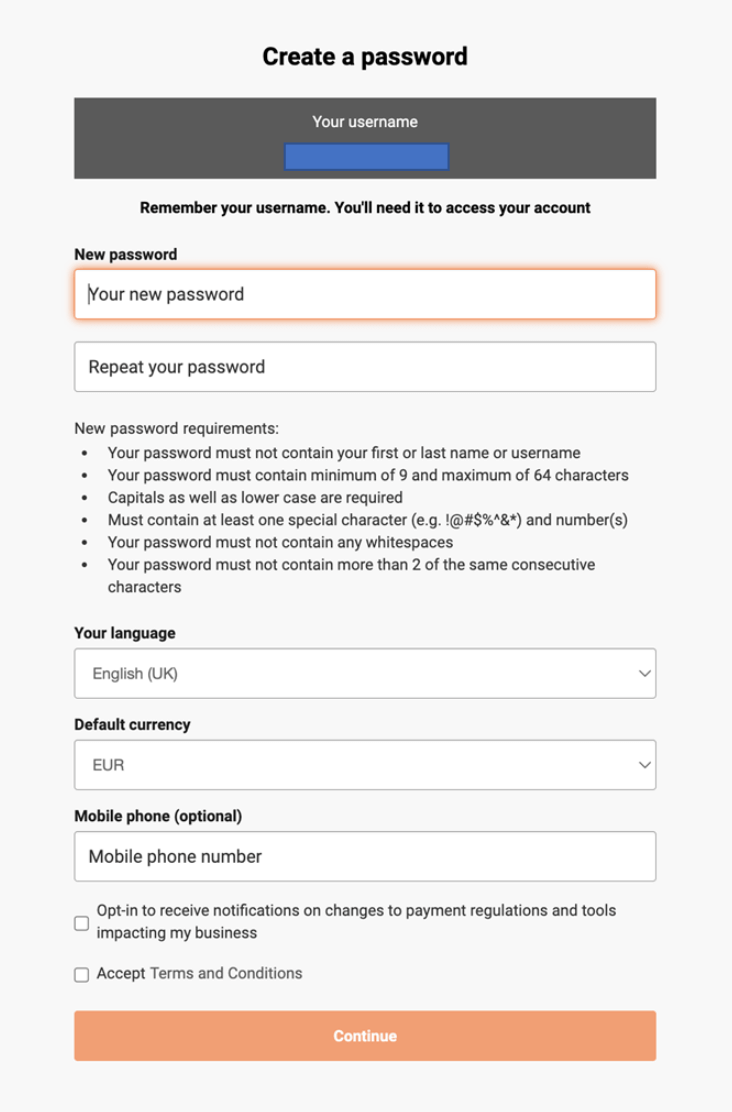
You will also be asked to create a new password and set preferences for the language and currency. In the currency field, please choose GBP. This selection will not impact your online store, and other currencies can be set in your payment gateway.
Please finish this step by navigating through the remaining fields, such as providing an optional mobile number and consent choices. Once done, please click continue.
Step 3: Finish Setting Up Your Account
The final steps of the account set up are for added security. We recommend that you enable two-factor authentication on your account, with the “one-time password via email” option.
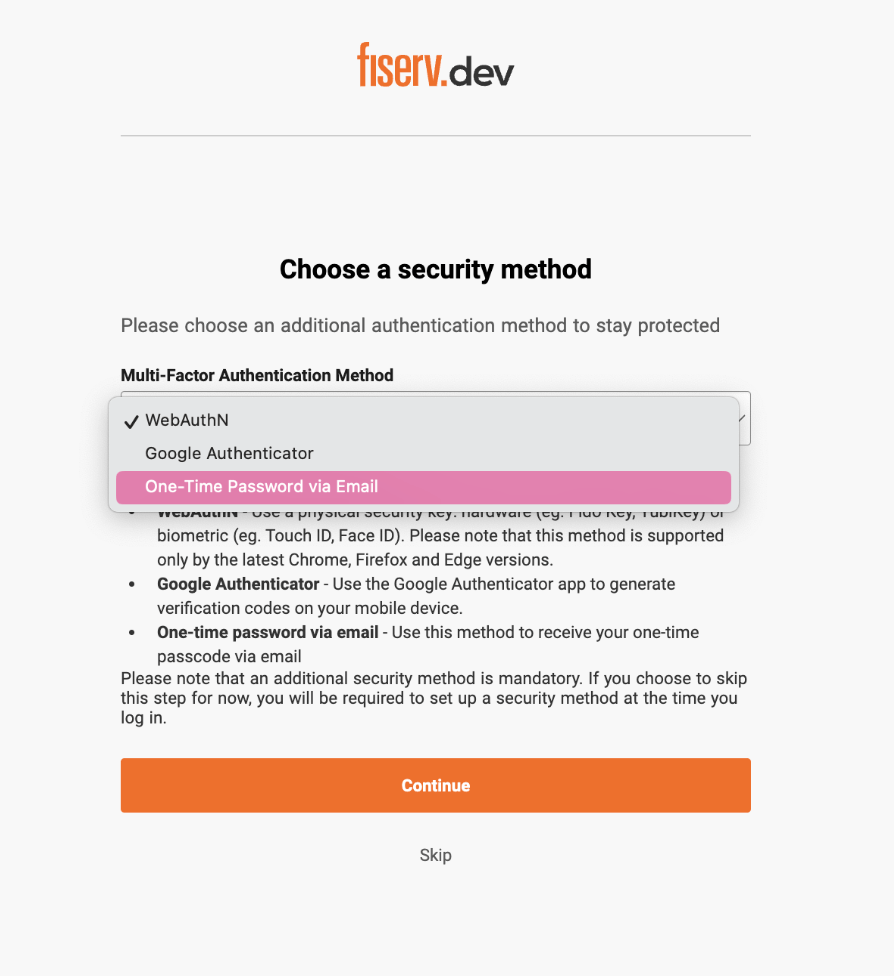
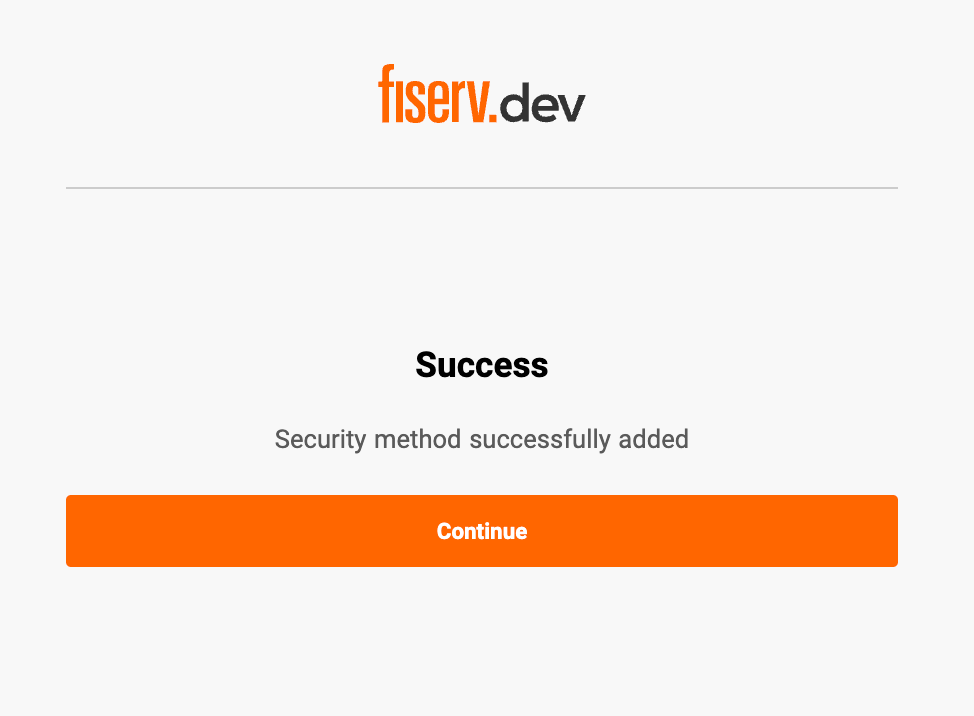
Once done, you will see a notification that your account has been set up successfully, and will be prompted to sign in once more. Please do this.
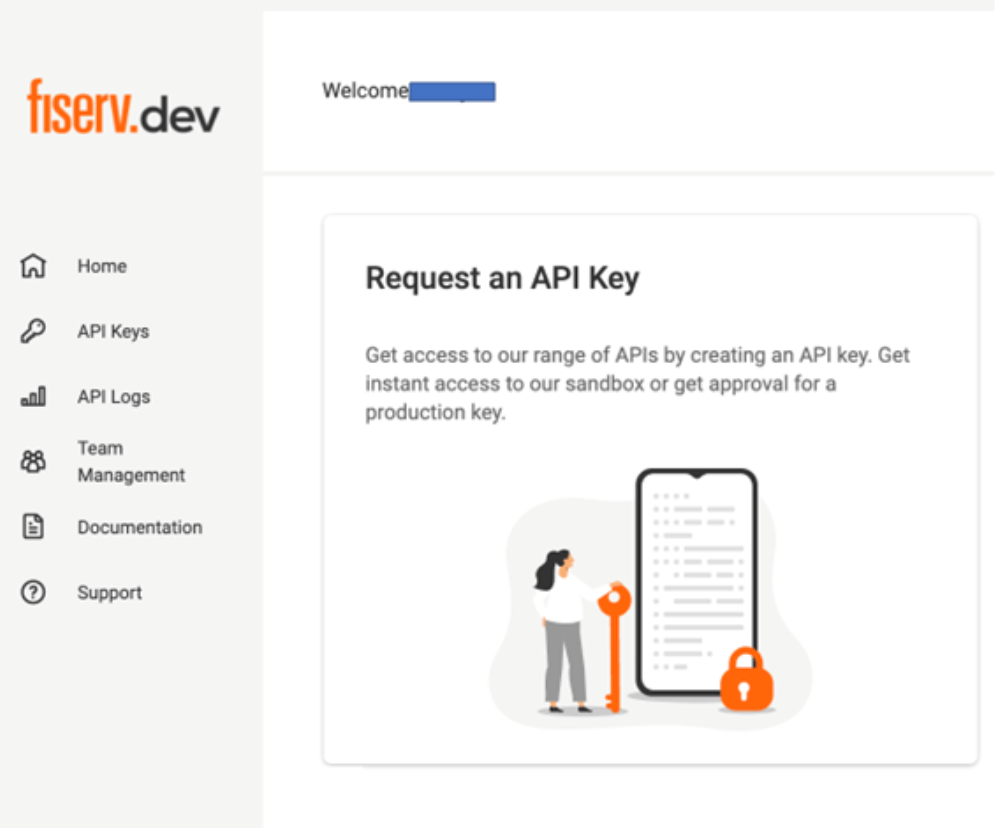
Once you’ve reached this page, you will need to log in again with your details, and you will be navigated to see the option to request an API Key.
Step 4: Request Your REST API Credentials
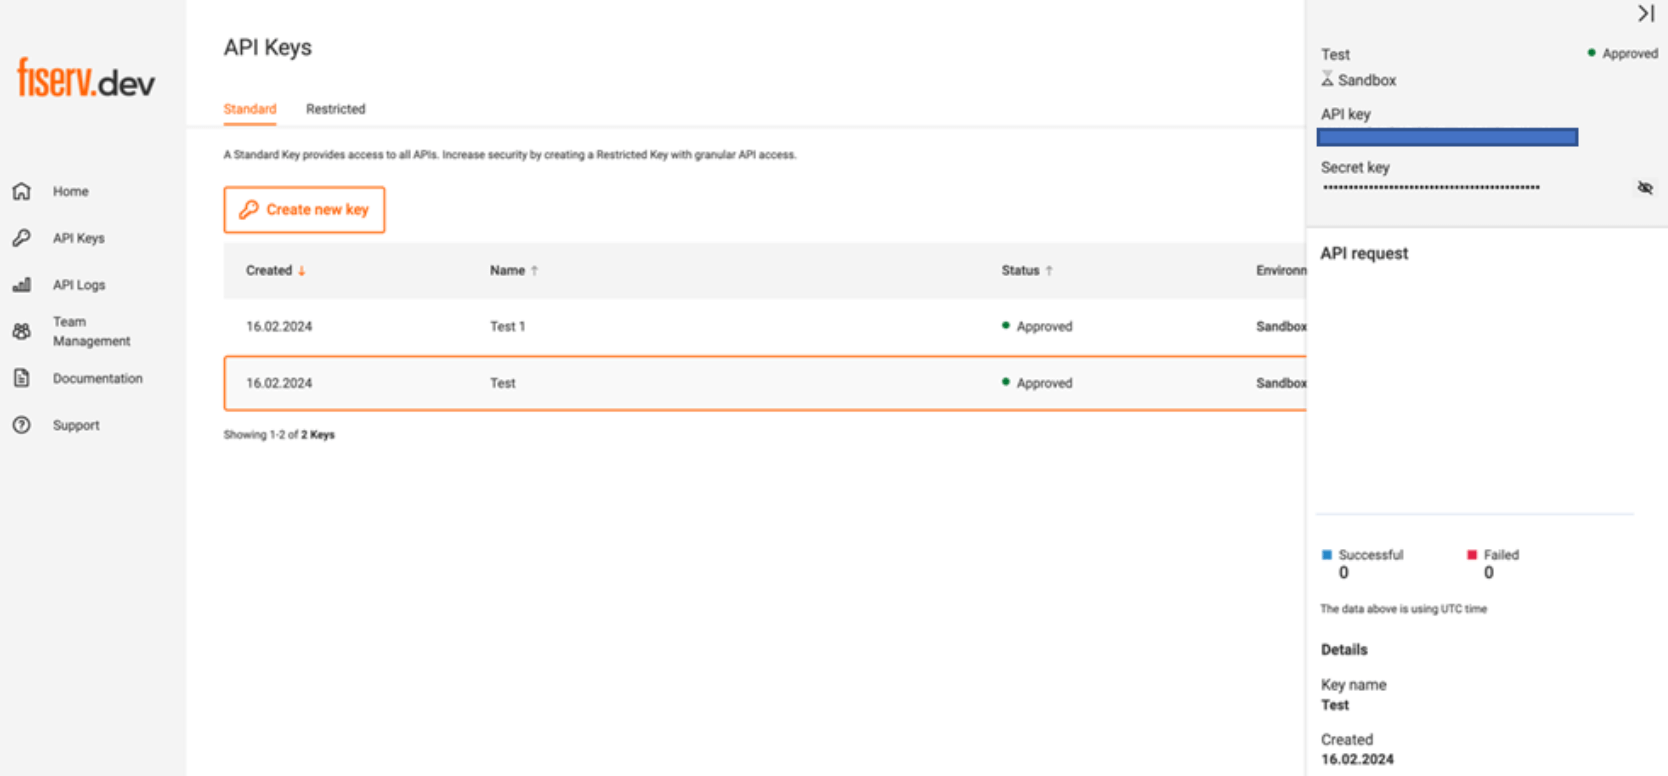
Now you are in your account, you can request your REST API credentials. Go to the “Request API Key” page and choose the “standard” tab. On this page, you will see an option to “create new key”, please select this.
On the pop up that appears, there will be a few options to select before saving your key. Firstly, choose between the sandbox or production options, depending on whether you are creating a key for a test or live environment.
Please also input a relevant and identifiable name for your new key.
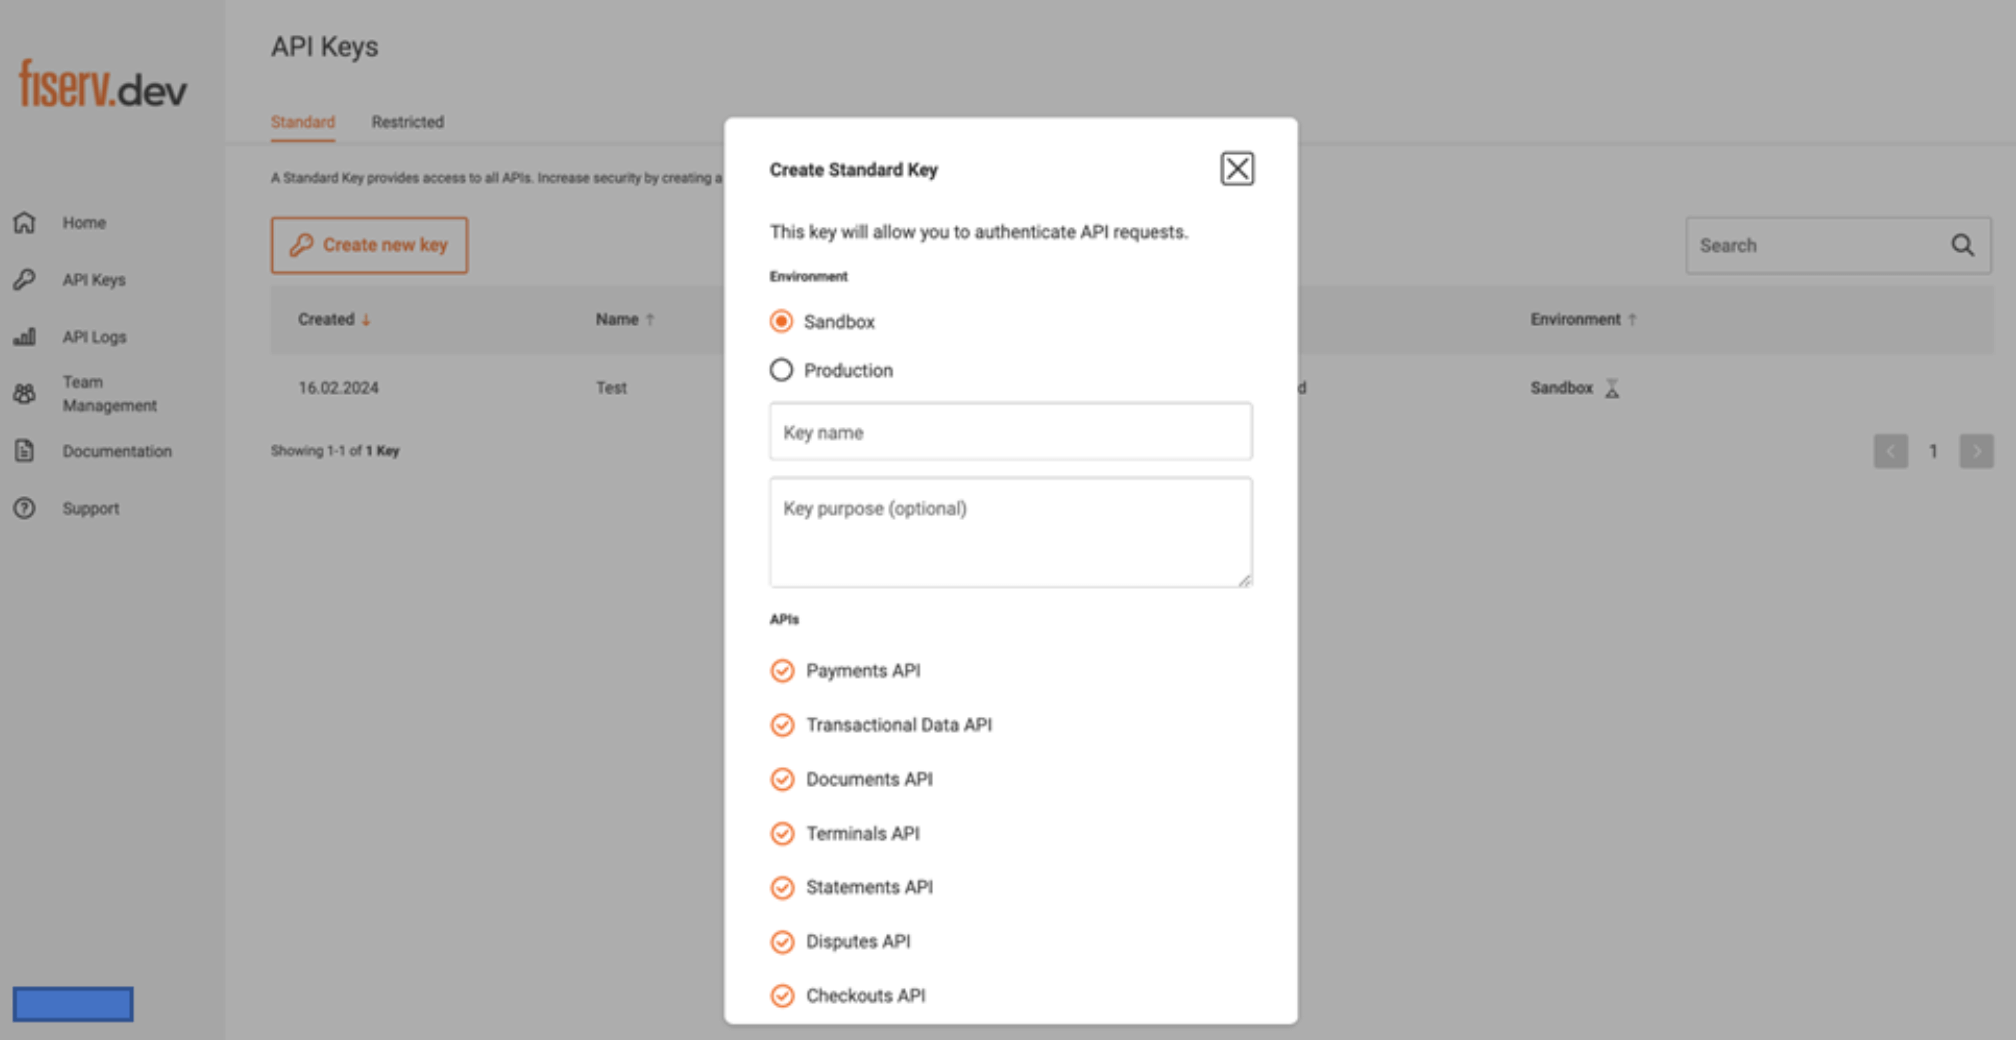
You have now generated your new REST API key. On the screen, the key will now appear in a list – please click the key to see its details, including the Secret Key.
Link Your API Key and Store
Now that your REST API key is created, you cam ask Fiserv to link it to your merchant store.
Sandbox (Test) Environments
Please send an email to authipay@aibms.com with the below information:
- API key name
- Store ID (please ensure this is the ID of the store you would like to link)
- Email address used to create the account
Once linked, your sandbox environment and features will be ready to use.
Production (Live) Environments
For production environments, the API key and API secret will not be received straight away. Once ready, please send an email to authipay@aibms.com with the below information:
- API key name
- Store ID (please ensure this is the ID of the store you would like to link)
- Email address used to create the account
Once linked, your production environment and features will be ready to use.
Please note, merchants are required to send the email to the AIB MS AuthiPay Fiserv mailbox, NOT third-parties on their behalf.
Refunds
To be able to issue refunds, you will also need to notify Fiserv to connect your store ID and REST API key.
You can use the below email template, but please be sure to include your relevant details. Please send the email to authipay@aibms.com
“Hi Fiserv team,
Can you please link the below STORE ID with the REST API Key?
- Store ID:
- Email Address:
- Key Name:
Can you please confirm once this is done?
Thanks
SENDER_NAME”
How to Configure the New REST API in Your WordPress Dashboard
Once you have received your REST API Key and Secret, you are ready to integrate them with your WordPress website. To do this, please follow the below steps:
- Log into your WordPress dashboard as the administrator
- In the menu on the left, navigate to WooCommerce >> Settings >> Payments
- Click “Manage” under the Payments section to access the AuthiPay Payment Gateway plugin
- Locate the New REST API tab. This is where you can input the API Key and Secret from your Fiserv account
How to Configure the New REST API in Your Magento Dashboard
Once you have received your REST API Key and Secret, you are ready to integrate them with your Magento website. To do this, please follow the below steps:
- Log into your Magento dashboard as the administrator
- In the menu on the left, navigate to Sales >> Payment Methods >> Autify Digital >> AuthiPay Payment
- Input the API Key and Secret from your Fiserv account
- Click the “Save” button
How to Configure the New REST API in Your Prestashop Dashboard
Once you have received your REST API Key and Secret, you are ready to integrate them with your Prestashop website. To do this, please follow the below steps:
- Log into your Prestashop dashboard as the administrator
- In the menu on the left, navigate to AuthiPay Payment >> Configurations
- Input the API Key and Secret from your Fiserv account
- Click the “Save” button
Conclusion
Your REST API key, website and AIB MS AuthiPay integration are now successfully linked, and you’re ready to leverage the full potential of your payment gateway!
If you require any further support, please do not hesitate to contact us.
Read More Blogs

What We Learned Building an Official Shopify Payment App
Shopify is one of the world’s leading ecommerce platforms, with a growing
Getting REST API Credentials from the Developer Portal for your Clover Payment Gateway
In this guide, we walk you through the steps to retrieve REST API keys and