How to install GA4 and GTM to Shopify – flexible and customisable

In e-commerce, it’s very important to collect accurate data for the use and interactions with the online store amongst customers.
One of the best tools for tracking and analysing the performance of your store is Google Analytics 4 (GA4). Ecommerce platforms such as Magento and WooCommerce offer a native integration to collect and review a vast amount of information that can be useful for optimising your e-commerce and checkout experience.
Although later than others, Shopify has also released its native Google Analytics 4 integration, allowing a fast and easy transfer of your ecommerce and analytics data to merge with other sources of information in your GA4 account.
In this blog post, we show you how to correctly install the tracking for Google Analytics 4 in your Shopify store. We’ll focus on the native solution with Google and the YouTube channel app using Google Tag Manager (GTM), offer for us the more flexible and complete option among the methods which are currently available.
In this guide, we cover:
- The Google & YouTube Channel App
- Installing Google Analytics 4 on Shopify with the Google and YouTube Channel App
- How to test your Google Analytics 4 Shopify tracking setup
- Challenges of the native implementation of GA4 and GTM for Shopify
- Conclusion
What options do you have for setting up GA4 for your Shopify e-commerce?
There are different ways to set up the tracking for Google Analytics 4 (and Google Tag Manger) on Shopify, and each one is determined by the version of Shopify associated to your account (Standard or Plus).
While the native integration for GA4 is implemented in the same way through the use of the Google & YouTube Channel App, the Plus and Standard accounts allow a different level of customisation:
- If you are using Shopify Plus, then you can install the tracking code (or the code for your Google Tag Manger account) on all the pages of your Shopify store, including the checkout pages. The tracking with the Shopify Plus account includes all the main e-commerce events and Enhanced Tracking in GA4, including some additional events.
- If you are using the standard version of Shopify, then you can install Google Tag Manager on all pages of your store, excluding the checkout pages. The tracking with the Standard Shopify account only covers the main e-commerce events and the Enhanced Tracking in GA4. Additional set up is required for tracking other events with GTM.
In this guide, we focus on the installation of GA4 for the standard version of Shopify, which doesn’t allow customised tracking for checkout page. Much like Universal Analytics, the implementation is simple and straightforward.
You can consider the following options for installing GA4 on your Shopify store:
- The native Google & Youtube Channel App – we will follow this method in this blog post
- Adding Google Tag Manager header and body codes in the theme.liquid and in the checkout.liquid files of your Shopify theme, and implementing e-commerce and the GA4 tracking via tags on GTM
- The GTAG implementation
As the purpose of this blog is to explain how to implement a complete, flexible and customisable solution for tracking your e-commerce performance using the native GA4 and GTM Shopify integration, we will not cover the other existing solutions.
However, we have provided links to external resources which show you how to implement the GA4 – Shopify connection by using the custom implementation with GTM and GTAG.
What is the best option for you?
Ultimately, it depends on the level of flexibility and control you need.
Out of all three options, the native implementation via the Google & Youtube Channel App and the integration with Google Tag Manager is the best. It allows you to configure accurate tracking for your e-commerce with the ability to configure extra e-commerce events – and third party scripts or event tags – in your GTM account. This will allow you to leverage the simplicity of the Channel App, as well as the flexibility of GTM.
What about the other options?
The two other options have been effective solutions for GA4 tracking on Shopify for many years, but they both have some limitations which, in my opinion, make them less valuable than the native implementation proposed by Shopify.
For example:
- If you don’t use the Shopify native integration for e-commerce events, there could be issues for some event parameters, such as taxes, shipping and revenue.
- GTAG is restricted to only work with Google-related tags (so no third-party tags like Facebook), and each tag needs to be specified by a developer. This means it doesn’t integrate with additional third-party scripts that could be tracked to provide useful date.
- Implementing GA4 tracking on Shopify with Google Tag Manager is fully flexible and customisable with new tags, as well as third party sources (Hubspot, LinkedIn, Facebook, etc). The Debug mode also allows an easy and risk-free testing environment.
- However, it requires more technical skills as everything needs to be set up manually.
- The use of the custom Google Tag Manager implementation could make it very difficult to pass product variants (led efficiently by Shopify) and could lead in duplicate tracking with incorrect revenue values.
- Also, as reported by Shopify, as of August 13, 2024, checkout.liquid for the information, shipping, and payment pages will be turned off and no longer supported. As of August 28, 2025, checkout.liquid for the thank you and order status pages will be turned off and no longer supported. This also includes turning off apps using script tags and additional scripts under the post-purchase and order status pages. Shopify Scripts will continue to work alongside checkout extensibility until this date. This means that you will not be able to edit the checkout.liquid file with custom datalayer or events using GTM anymore.
If you are using the GTM implementation or want to use it, you will need to update to “Checkout Extensibility” or move to Shopify Plus (which it is included in) by the deadlines mentioned.
The Google & YouTube Channel App
The use of the Google and the YouTube app to install Google Analytics 4 on Shopify is the native integration mentioned above.
When you connect your Google Analytics 4 through the app, the tracking is automatically installed in your store and automatically tracks Google Analytics events in your property without further configuration. The data layers are automatically installed in your e-commerce for a set of main events without the need for any further implementation.
After installing Google Analytics 4 in your Shopify store, the reports in GA4 will start populating with the events defined in the Enhanced Tracking of GA4:
- page_view
- scroll
- click
- view_search_results
- video_start, video_progress, video_complete
- file_download
- form_start, form_submit
The following e-commerce events will also be tracked:
- view_item
- add_payment_info
- Add_to_cart
- begin_checkout
- purchase
It is important to highlight that the native implementation with the Google & Youtube Channel App doesn’t track any other, or additional e-commerce events that could be useful for performance analysis. The following events are available on Shopify Plus:
- Add_shipping_info
- Remove_from_cart
- Select_item
- Select_promotion
- View_cart
- View_item_list
- View_promotion
This is why you will need both the Google & Youtube Channel App and GTM for a complete GA4 Shopify tracking setup.
The use of Google Tag Manager is also important for the correct functioning and tracking of third-party scripts, additional events and pixels that are not available as a native integration with Shopify.
Installing Google Analytics 4 on Shopify with the Google and YouTube Channel App
For this part of the guide, we assume you already have a property for your website on Google Analytics 4. If you have a new website or you want to create a new property, please follow the instructions provided by Google.
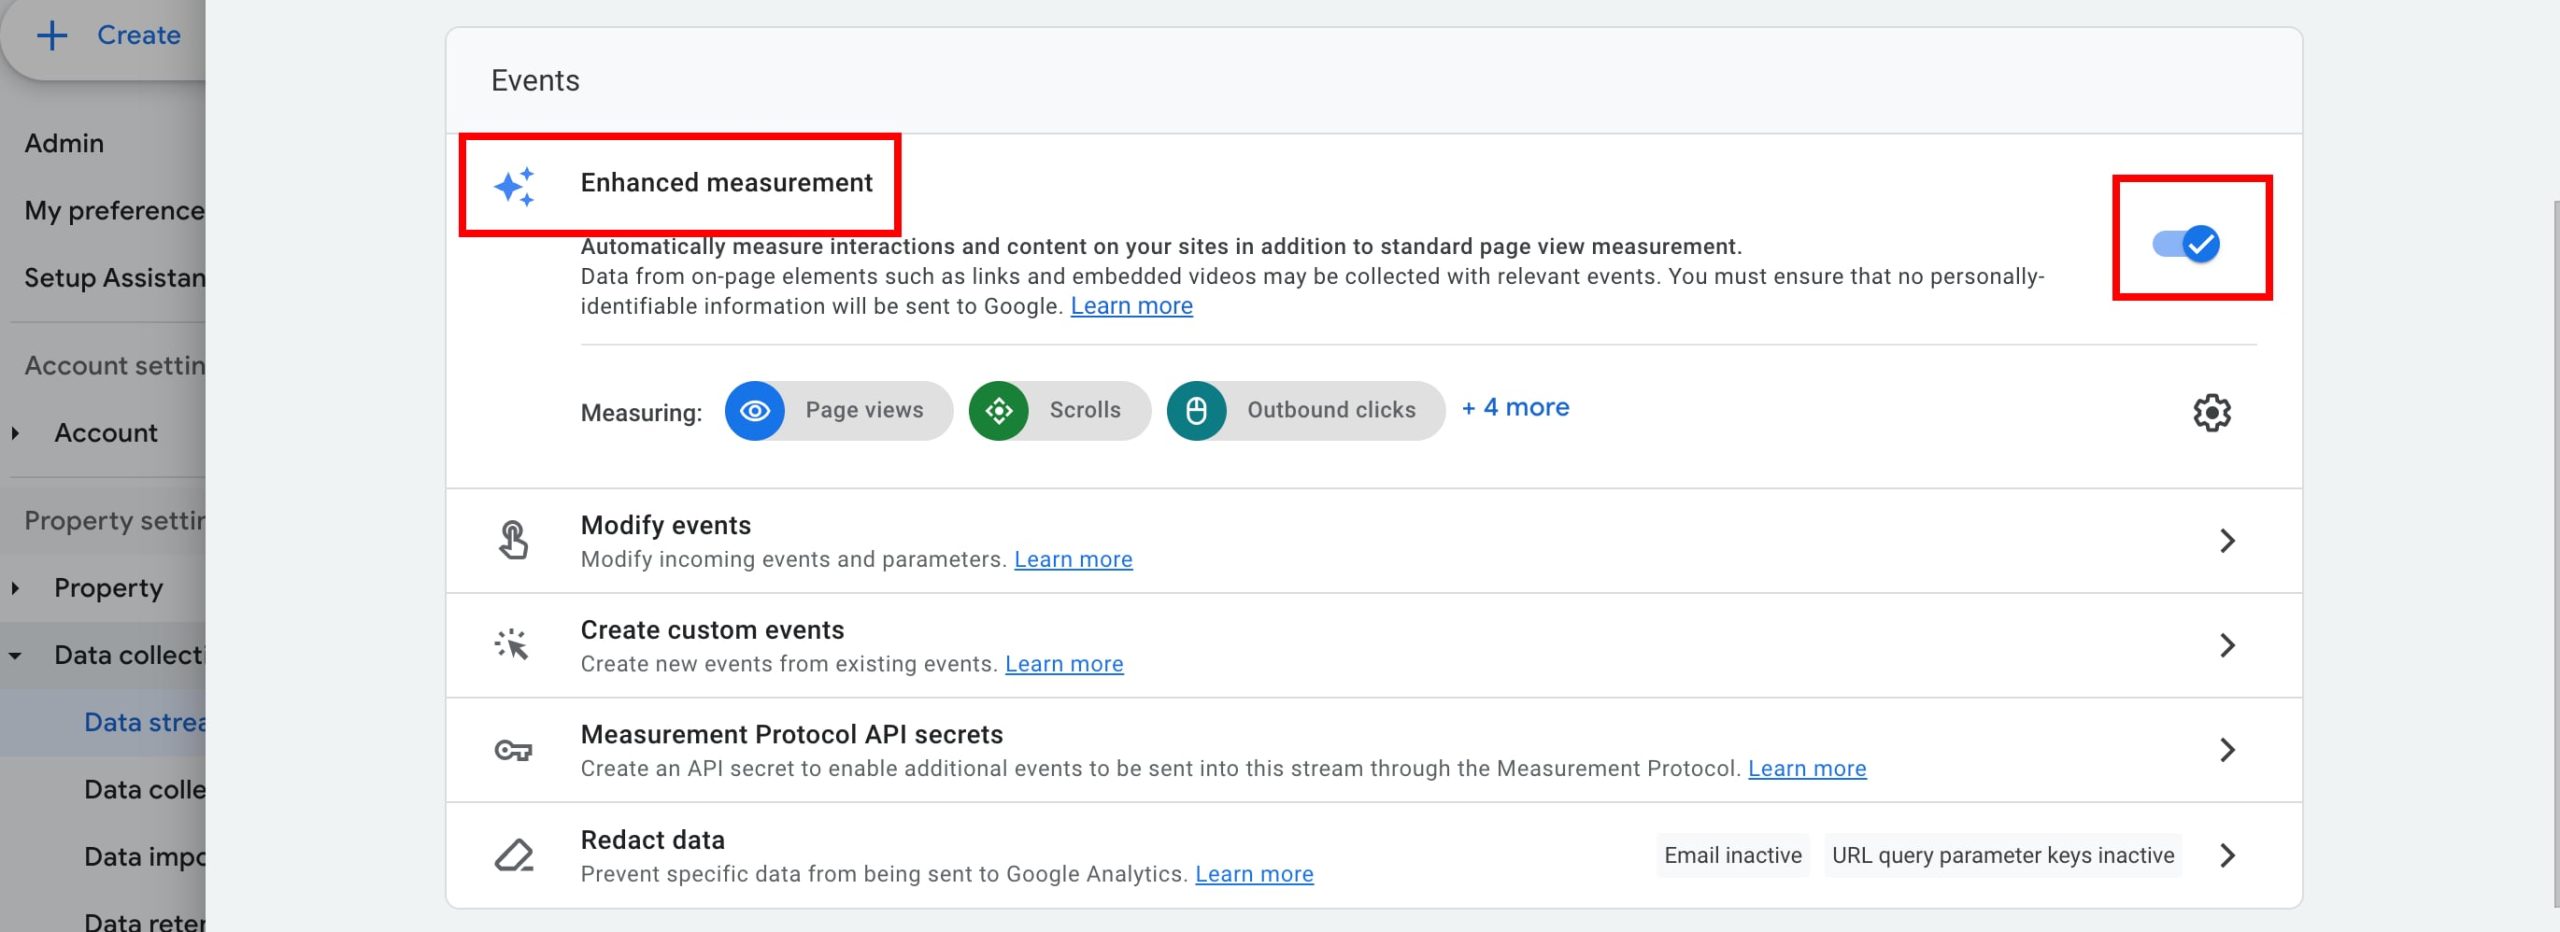
Enhanced Tracking on Google Analytics 4
Before starting, make sure you have setup your GA4 property properly, activating Enhanced Tracking on your web data stream. It is designed to help marketers get as many events in the reports as possible without the need for developers or configuration in Google Tag Manager. This includes these events: page_view, scroll, click, view_search_results, video_start,vide_progress,video_complete, file_donwload, form_start, form_submit.
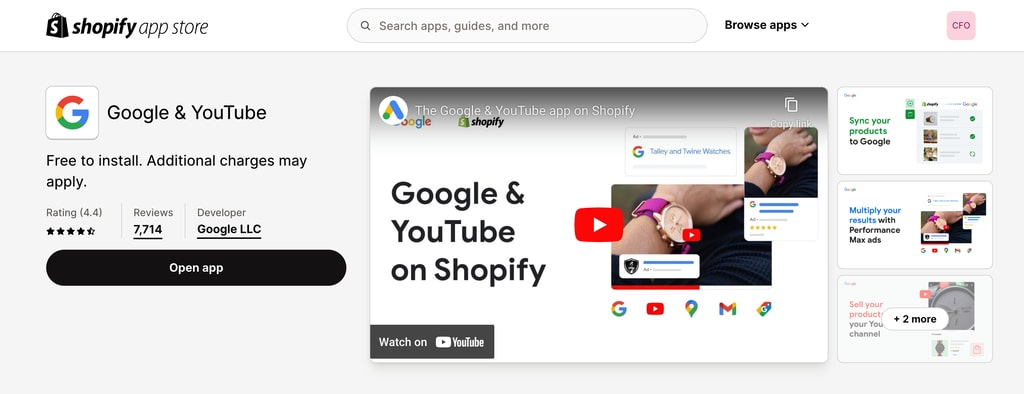
Adding the Google & Youtube Channel App to your Shopify store is very simple. You can follow the below steps:
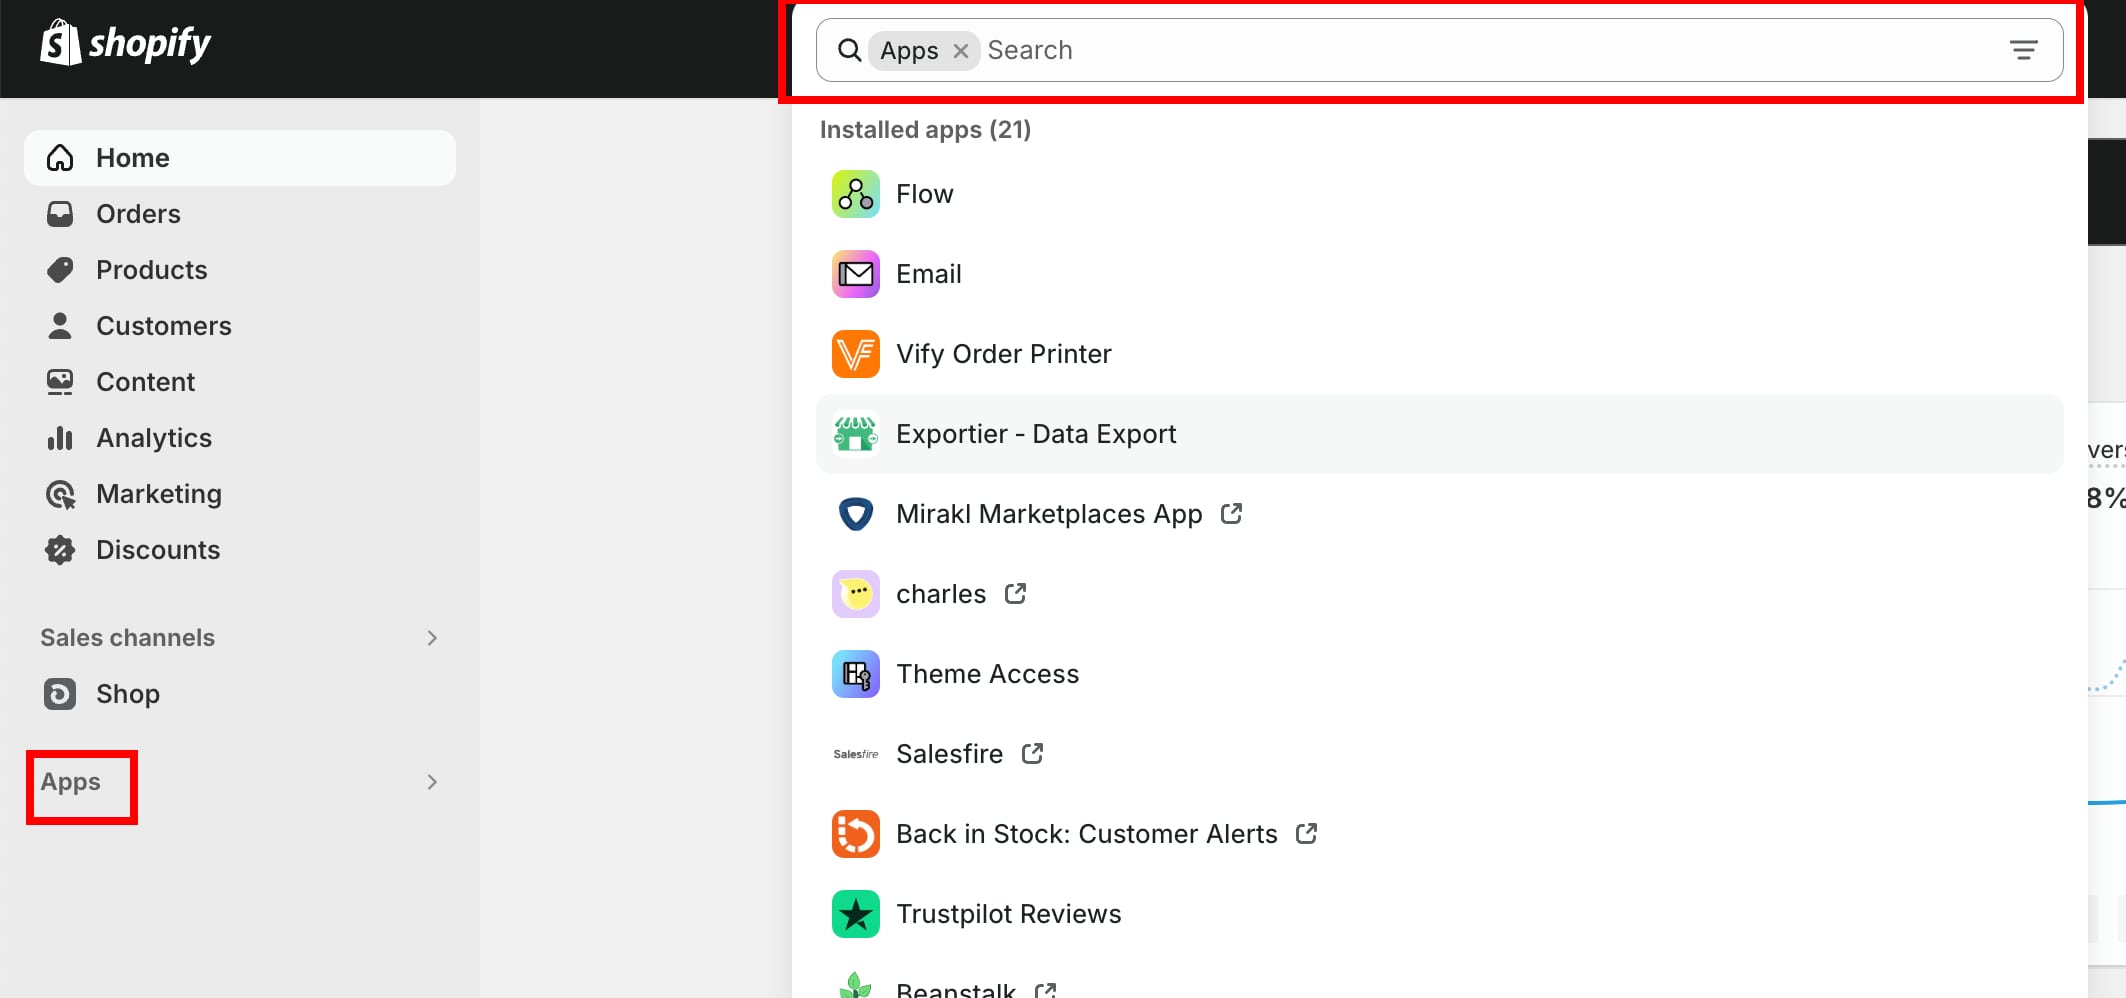
1. Enter your Shopify Store, navigate to the Admin section and click on the App menu.
2. Type “Google and Youtube” in the search box and press the enter key
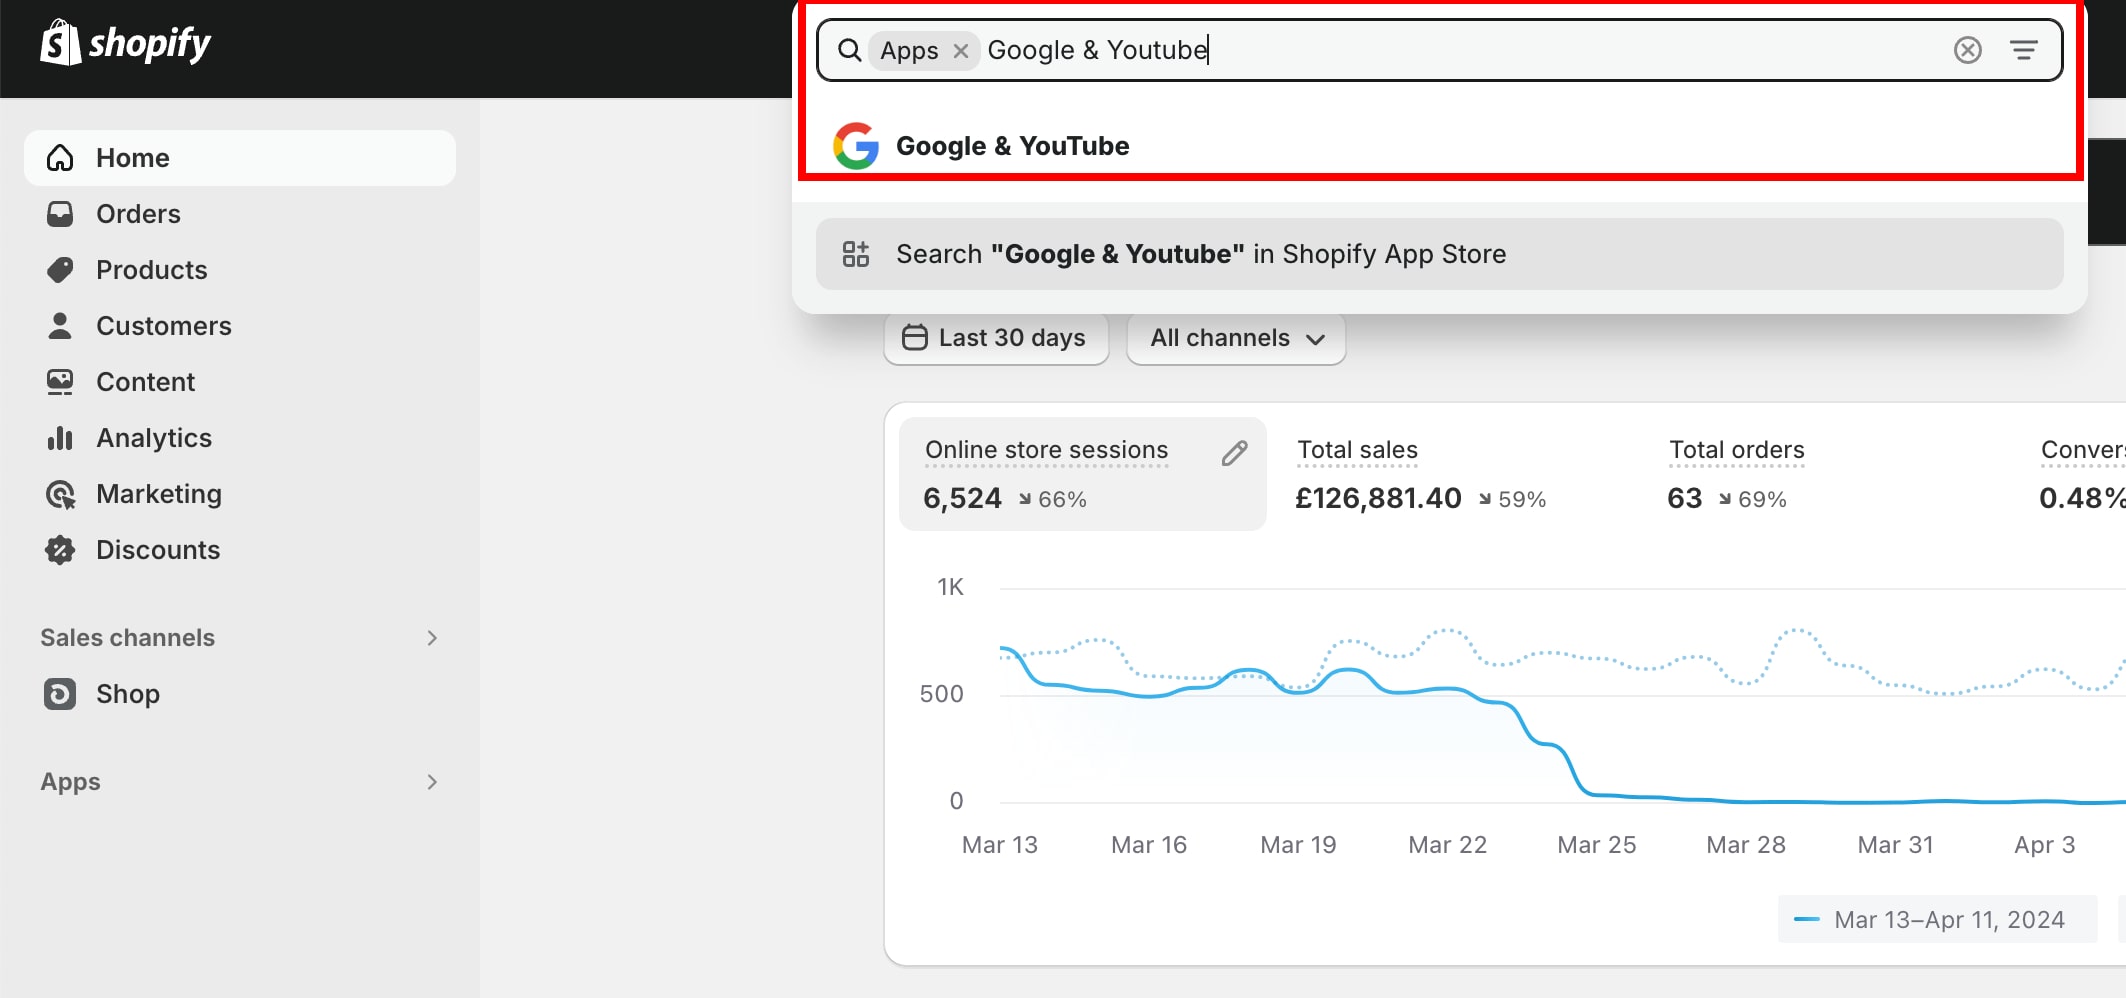
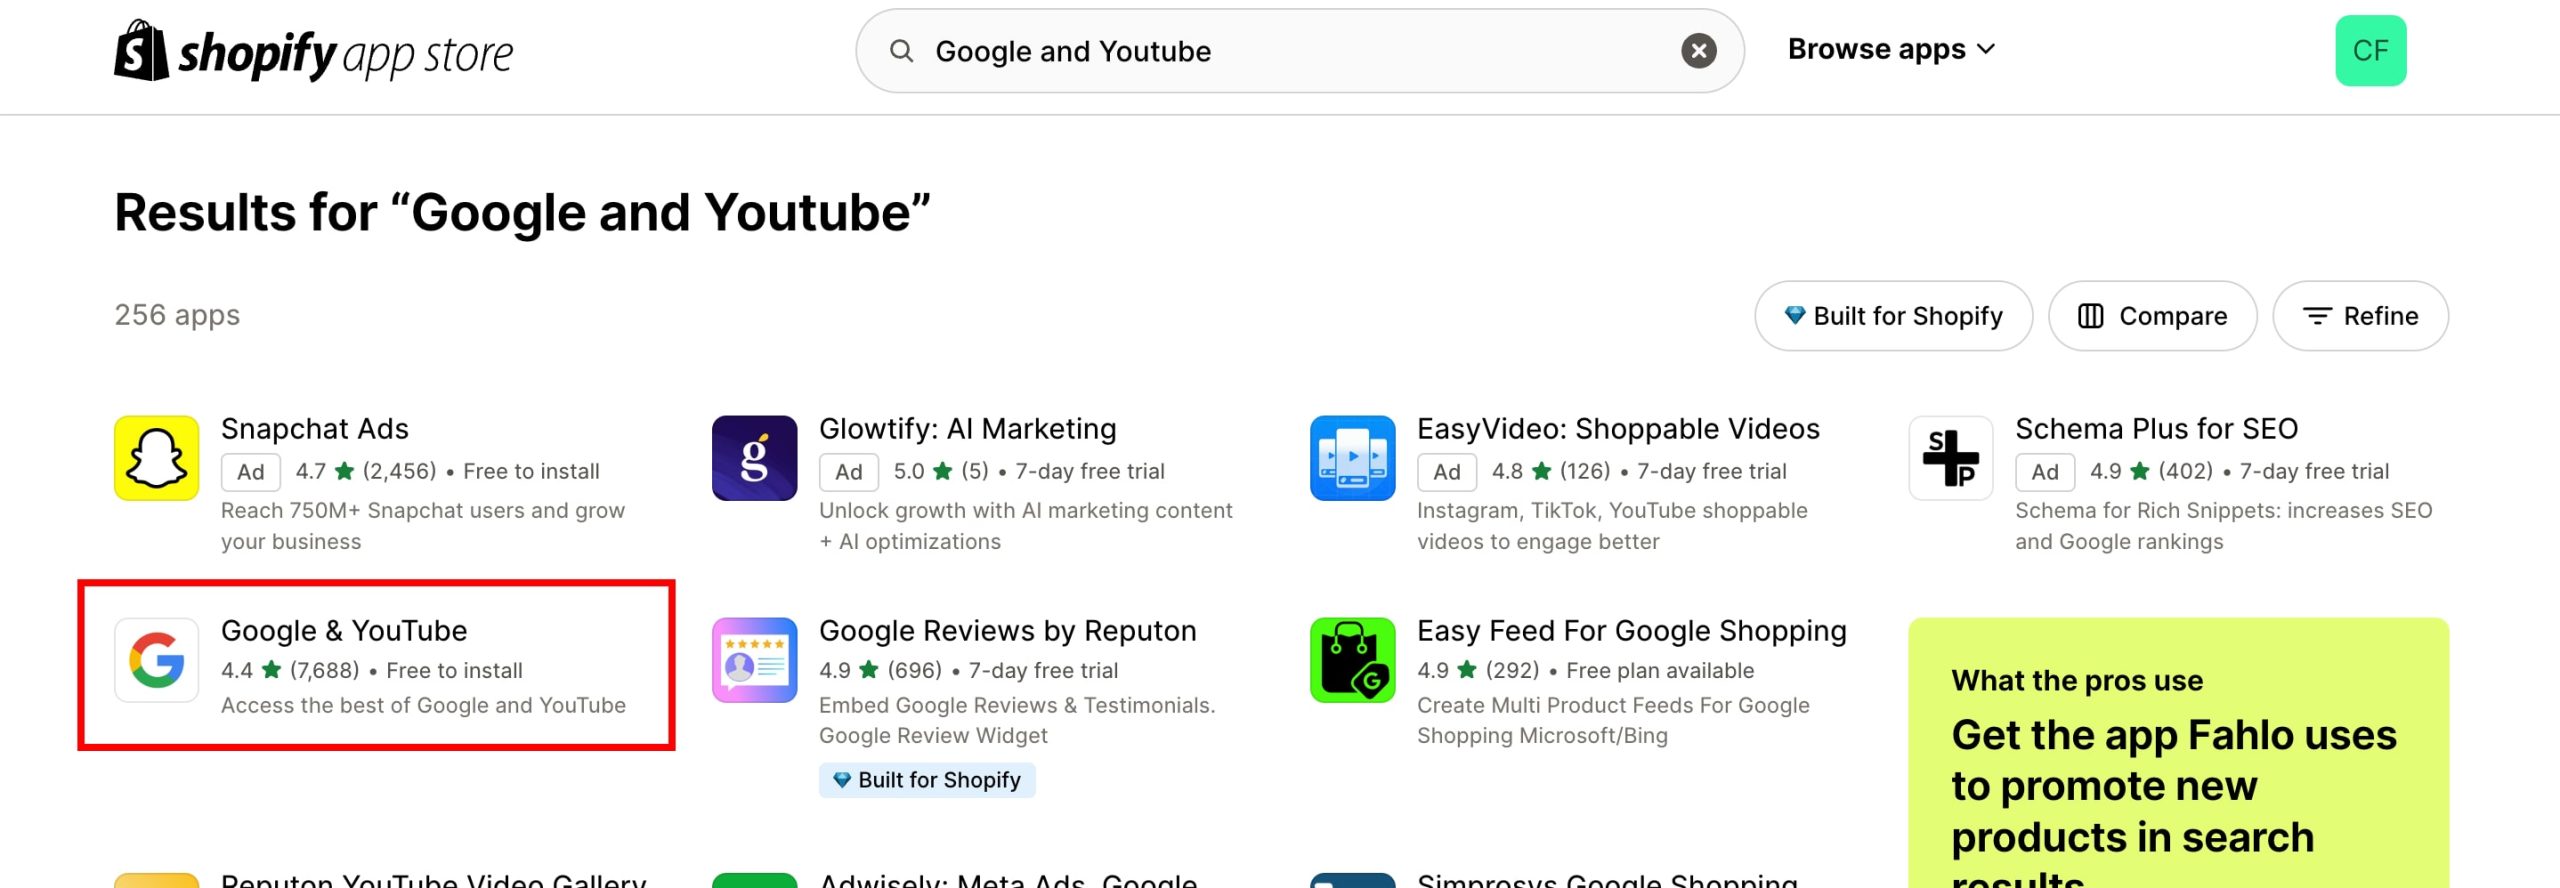
3. This should redirect you to a new tab showing the Shopify App Store
4. Click on the Google & YouTube app
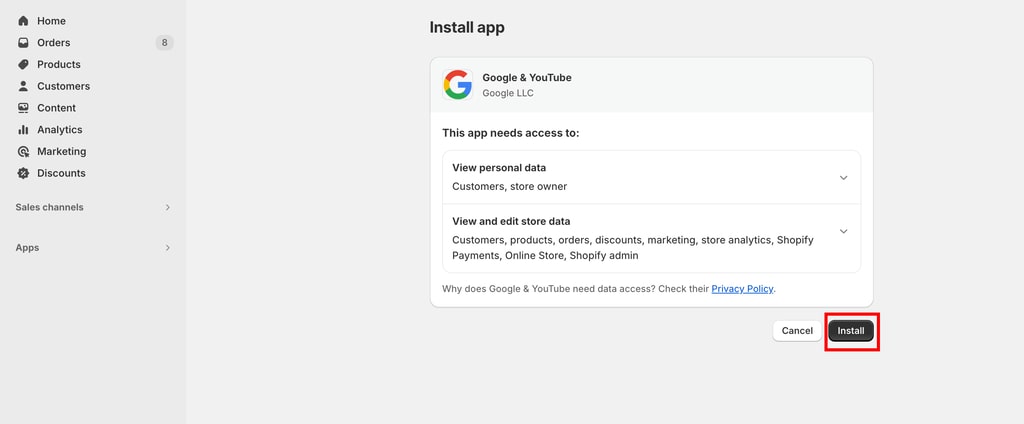
5. Click on the Install button
6. Click, under Sales Channel, to the Google & Youtube App
7. Click Connect Google account
8. Click on the Get Started section in the Looking only to setup Google Analytics 4 section
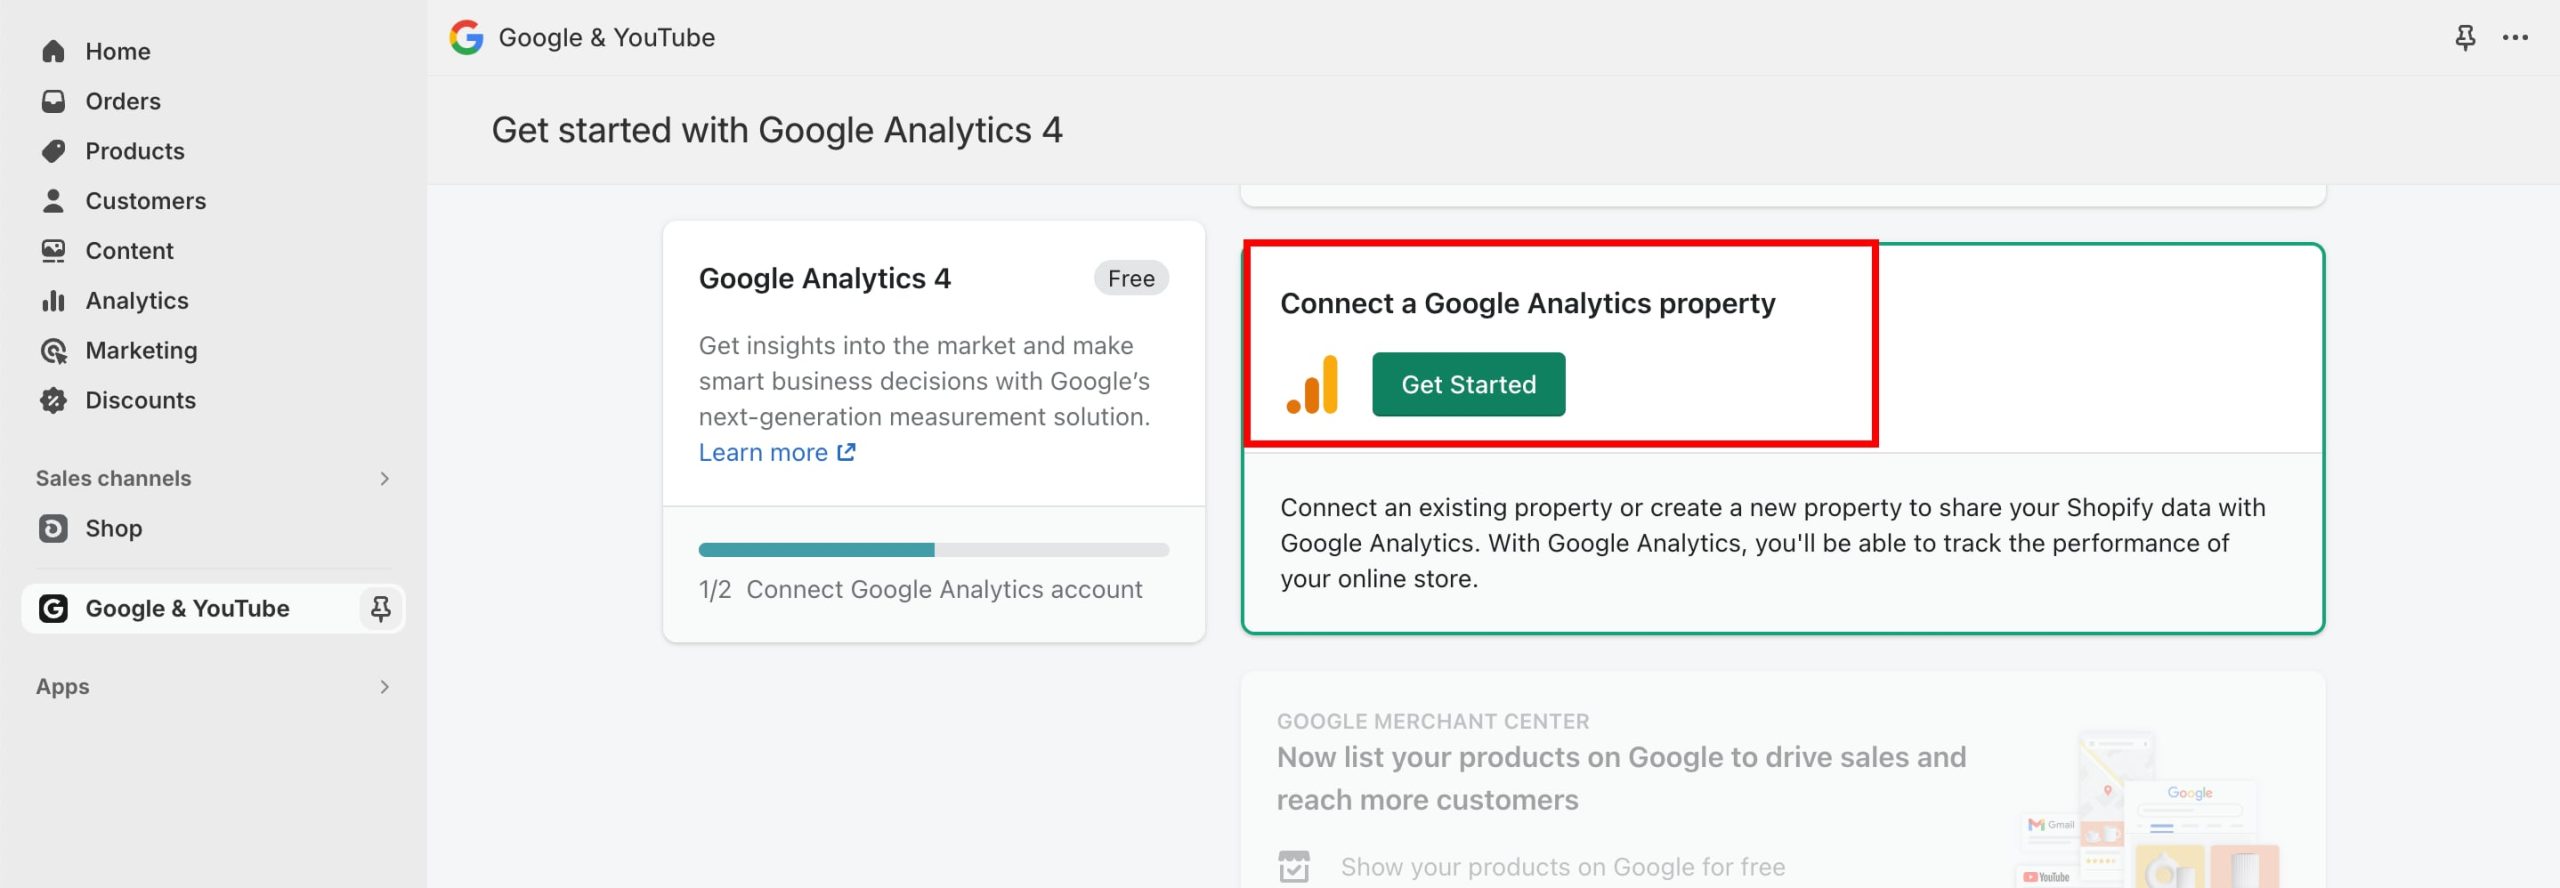
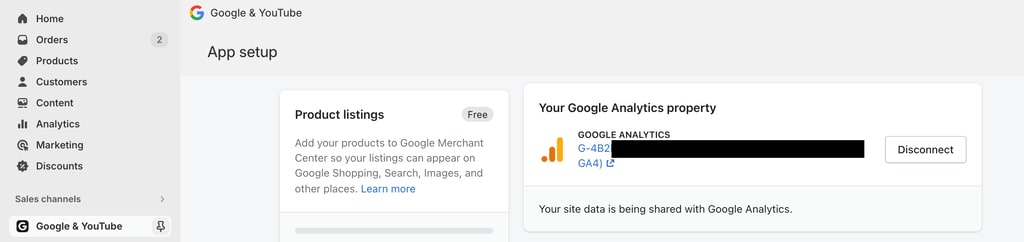
9. Select your Google Analytics 4 property from the drop-down menu and click connect
10. When selecting your property be sure the selection matches the property ID and the measurement ID (that determines what data stream will be connected to your Shopify Store)
11. At the end, you should see the message “You have successfully set up Google Analytics 4”
Add the Google Tag Manager (GTM) to your Shopify store
The implementation of Google Tag Manager on your Shopify store to manage new events and third party pixels cannot be done through the customisation of the checkout.liquid file in your theme anymore. To do this, you will need to start by creating a new Shopify custom pixel.
Please follow these instructions to add Googe Tag Manager to your Shopify store by using a custom pixel:
- Create a Google Tag Manager account, or log in to yours if you have one.
- Click on the container ID on the top-right of the page
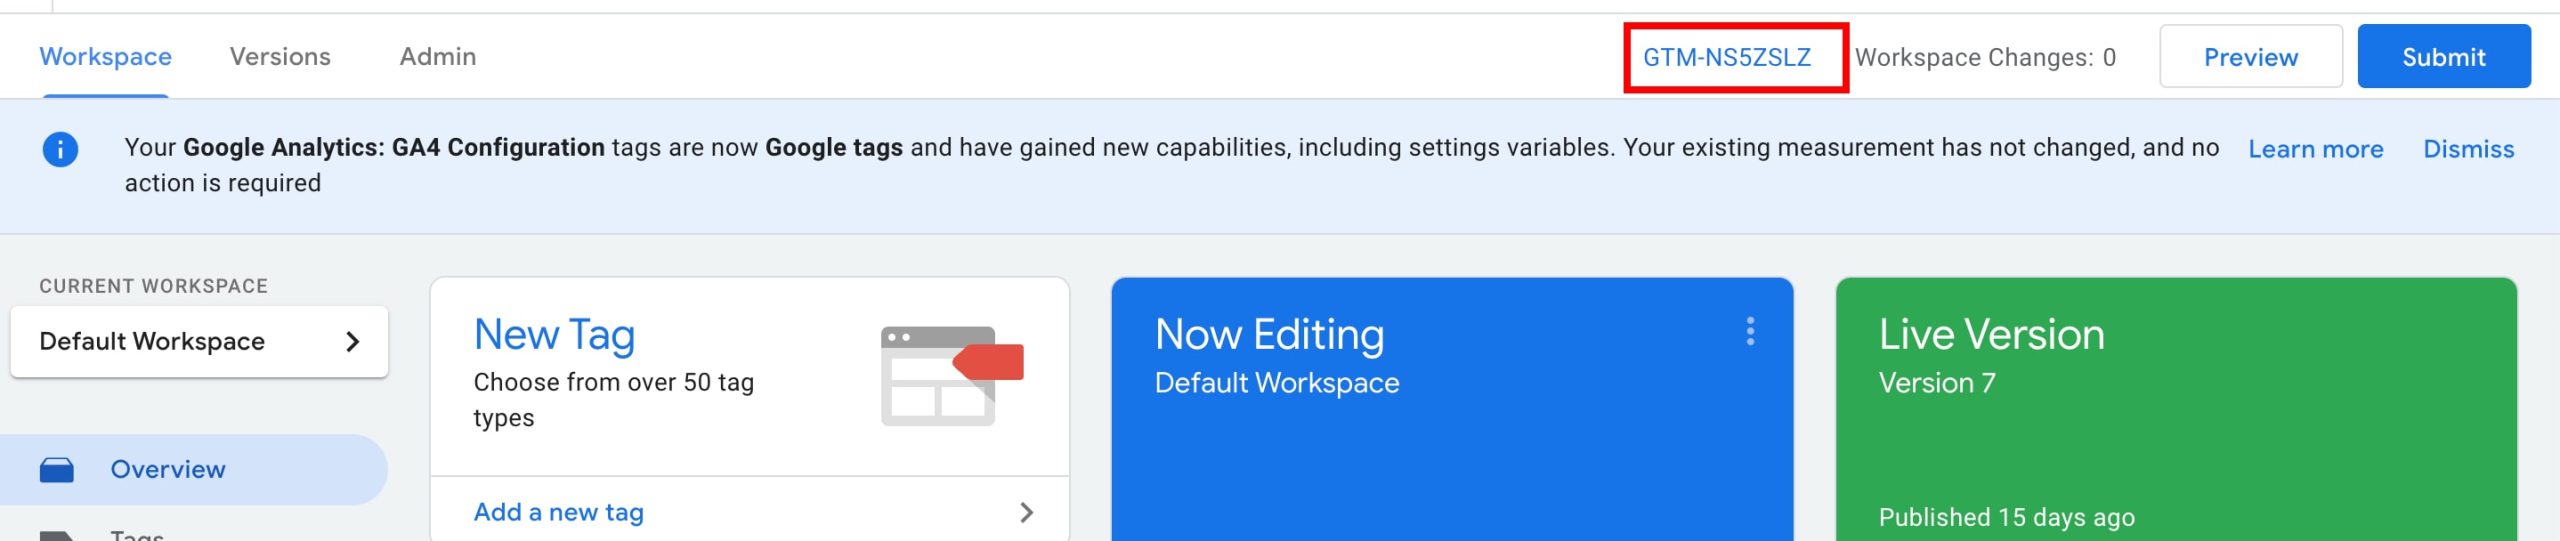
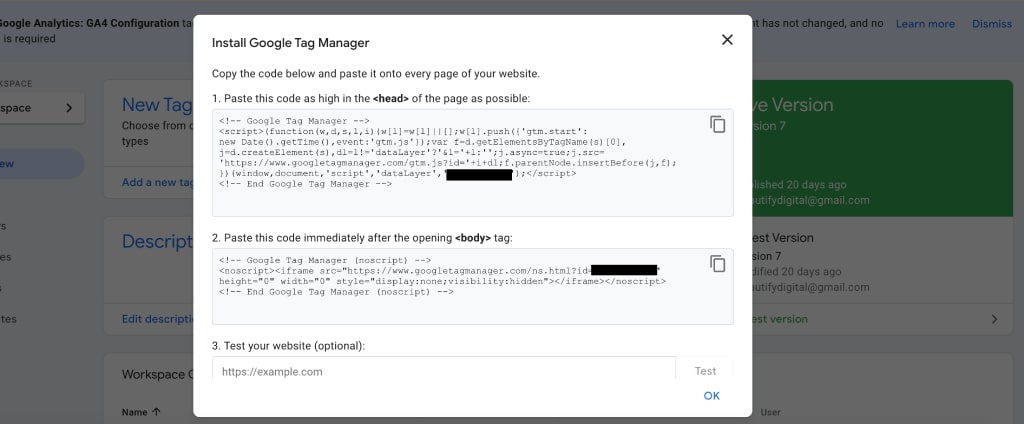
- Copy the first part of the GTM installation code by using the copy button
- Navigate to the Admin section of your Shopify store and click on “Settings”, then “Customer Events”
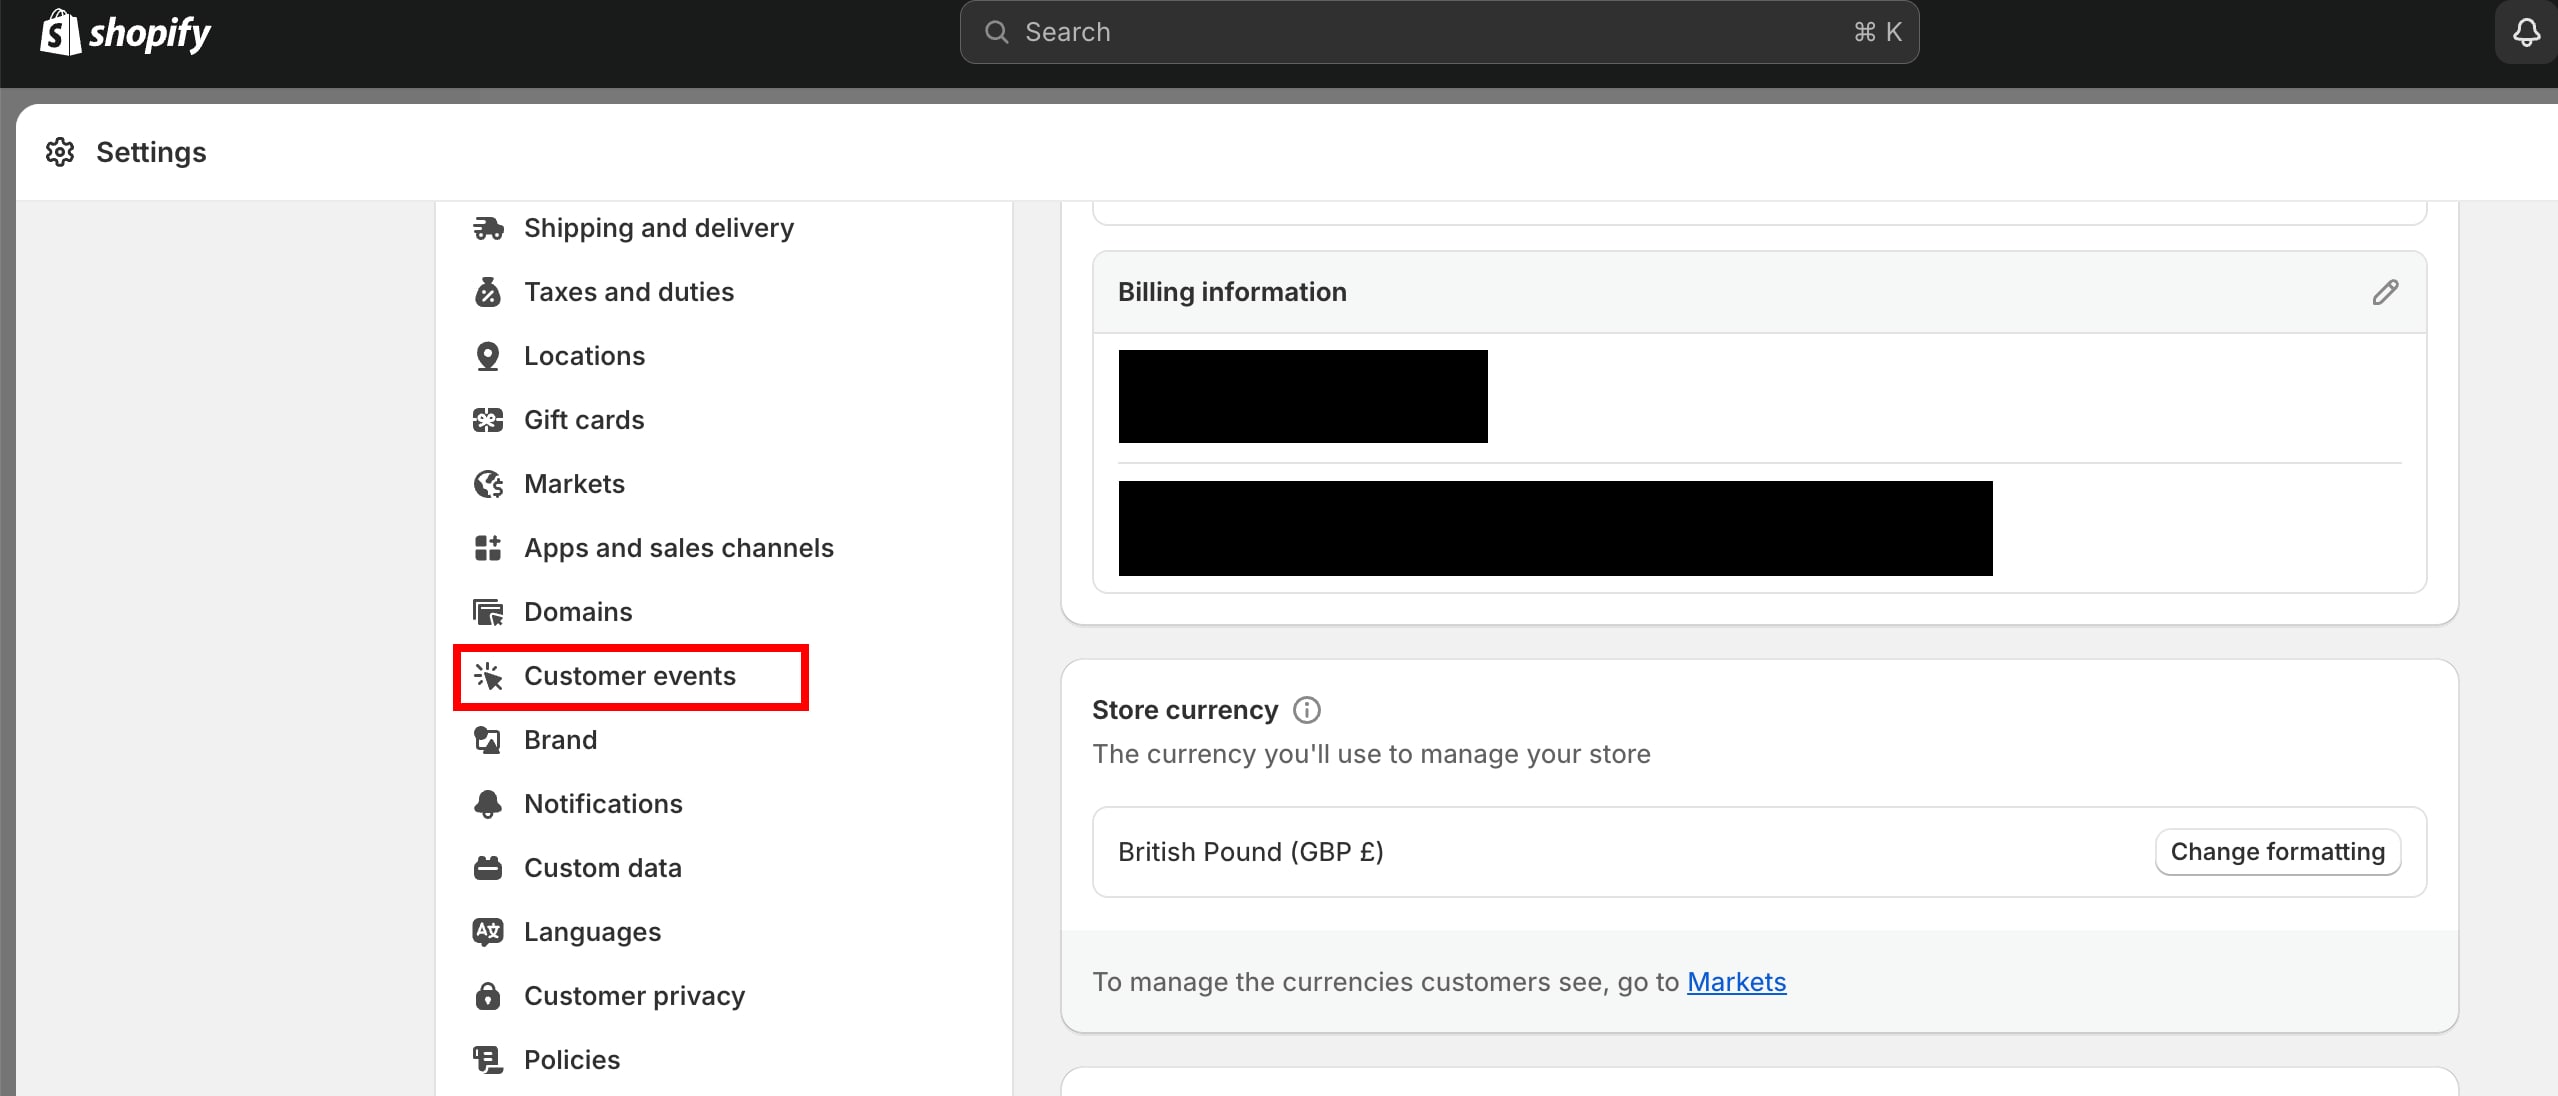
- On the top right of Costumer Events click on “Add Custom Pixel” and give it a meaningful name (i.e. Google Tag Manager Custom Pixel)
![]()
![]()
- Remove the HTML tags from the Google Tag Manager code block. For example, <script>
- Insert the remaining GTM code into a new Shopify Custom Pixel
![]()
- Scroll to the top of the page and click the save button on the top-right side of the page
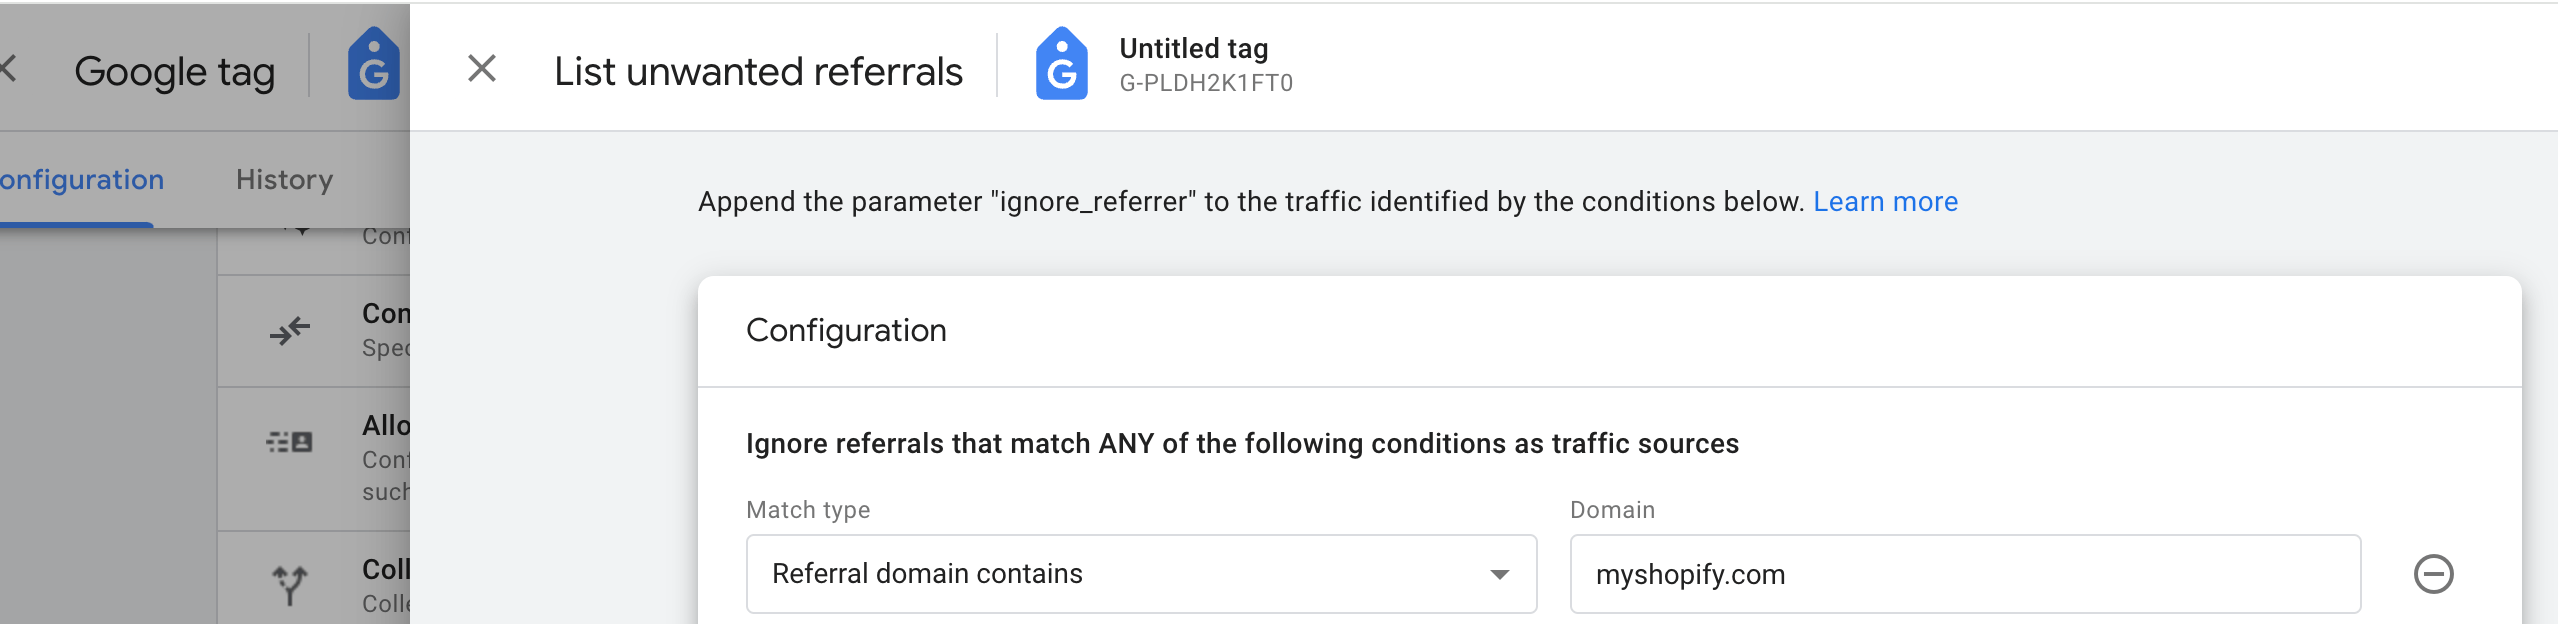
- Remove the checkout pages of your ecommerce platform from the referral traffic. Navigate to the List of Unwanted Referrals on your GA4 profile and add myshopify.com or your custom domain to the List of Unwanted Referrals.
You can finally configure your GTM Custom Pixel by adding the data layers related to the following custom events after the GTM code:
- Add_shipping_info
- Remove_from_cart
- Select_item
- Select_promotion
- View_cart
- View_item_list
- View_promotion
Once the data layer is in place, these specific events will also need to be configured on GTM too by defining tags and triggers, as normally done when tracking ecommerce events with Google Tag Manager.
Keep in mind that it is not necessary to define the other ecommerce events (i.e. begin_checkout, purchase, etc) as they are handled by the native Shopify implementation.
How to test your Google Analytics 4 Shopify tracking setup
To test the correct functioning of the GA4 and other GTM tracking setup on Shopify we can use the DegubView mode on GA4. For the data to appear, you will need to install a Google Chrome Browser Exentions called Google Analytics Debugger, as Google Tag Assistant and the Debugging View on GTM don’t work with custom pixels.
Once the extension is active and you have turned it on, you will start to see the events populating in your DebuView Mode on Google Analytics 4.
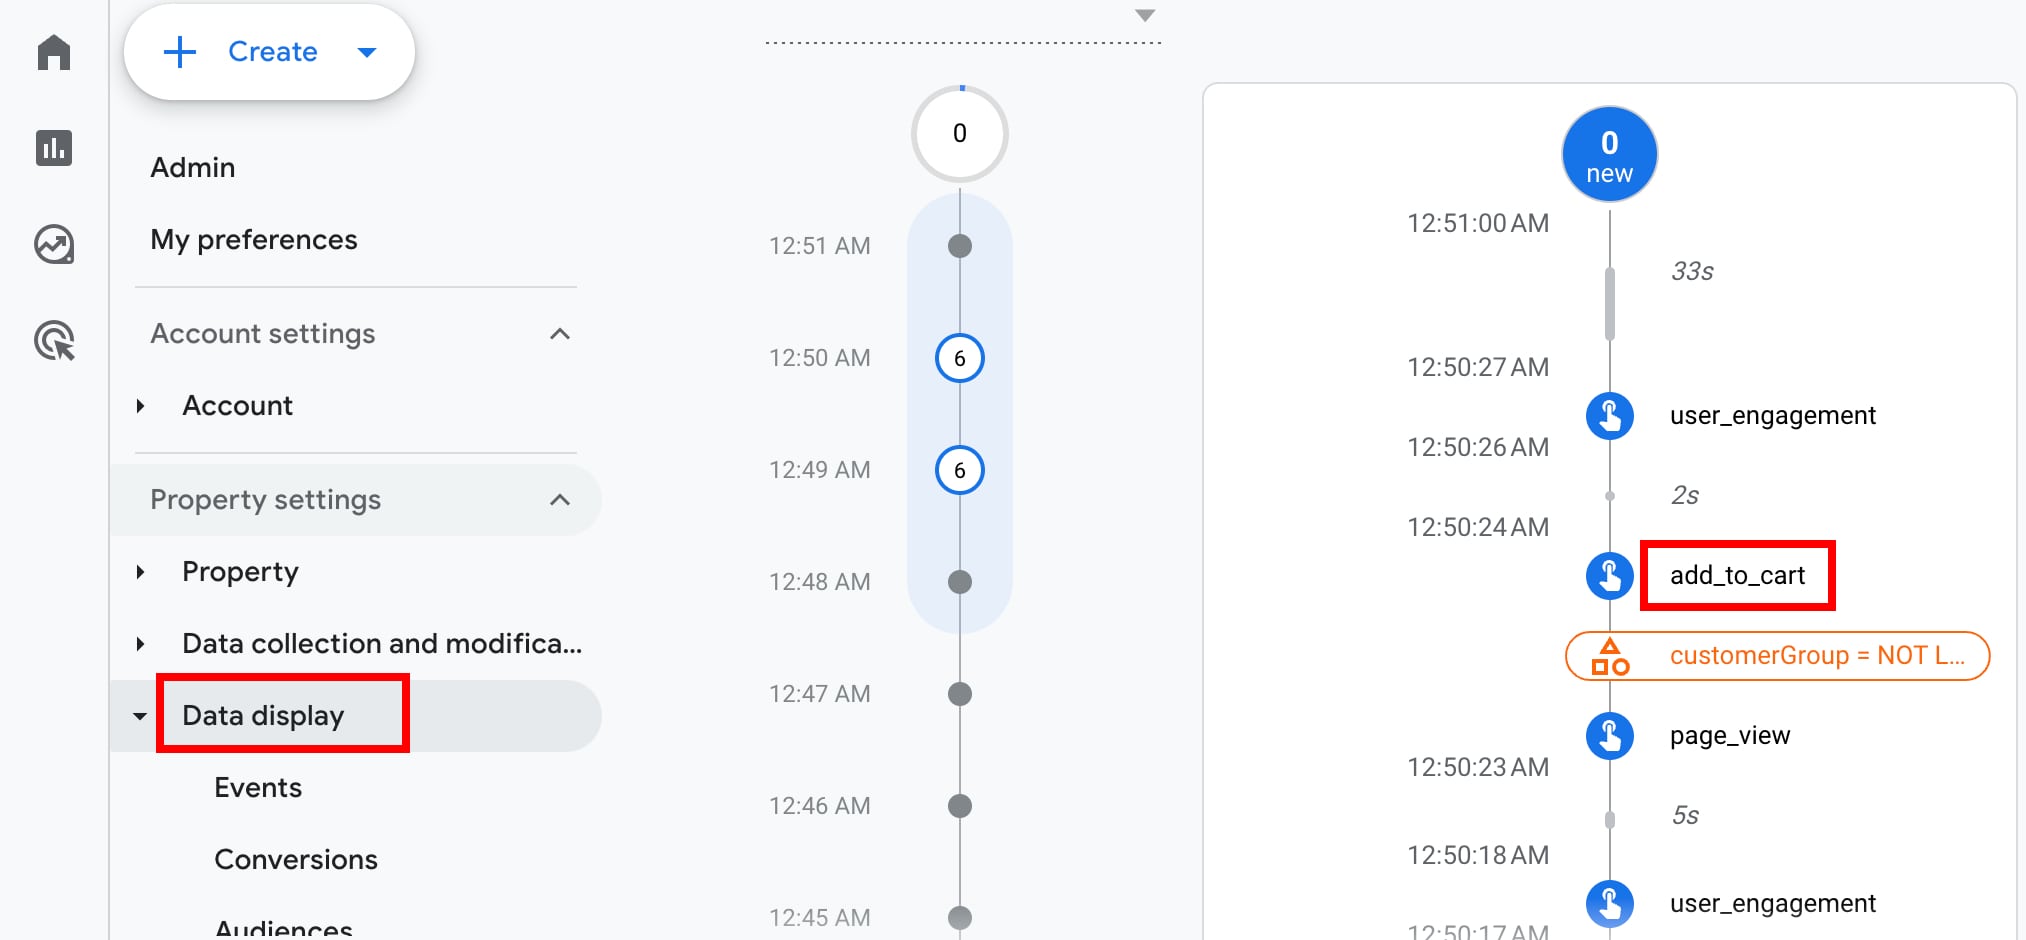
1. Turn on Google Analytics Debugger

2. Go to your GA4 property, scroll down and click the Admin and Debug View in your Data Display folder.
3. Go to your shop’s website
4. Navigate into your Shopify store and place a test order
5. Back in the Debug report, select your Debug Device
6. You should now be able to see the purchase, begin_checkout and all the ecommerce events in your report.
Alternatively, you can also use Tag Assistant Legacy to debug events on GA4 and GTM.
Challenges of the native implementation of GA4 and GTM for Shopify
Below we have highlighted the main challenges you may face when implementing GA4 for Shopify with the native Google & Youtube Channel App, and for each of them, we advise solutions to help:
- Duplicate data collection from the same measurement ID: this could happen when implementing ecommerce events both in GA4 and GTM. To avoid this, in your data layer, remove the ecommerce events that are already provided by the Google & Youtube Channel App from your GTM implementation. In the case of both Standard and Plus versions of Shopify, you also need to remove any previous trace of tracking with Google Tag Manager or GTAG – including all the data layers (if any) hard coded in one or more of your theme files to avoid tracking them twice.
- Tracking of referral traffic: If you use the standard version of Shopify, then you need to remove the checkout pages of your ecommerce platform from the referral traffic. Navigate to the List of Unwanted Referrals on your GA4 profile and add myshopify.com or your custom domain (if you have one). – This last step is not necessary if you are using Shopify Plus!
Conclusion
This completes your installation of GA4 and GTM on Shopify using the native solution provided by the platform.
As you can see, there are different ways to install GA4 on your Shopify store, each with its own pros and cons. We think that the native implementation, coupled with the use of Google Tag Manager, gives a flexible and customisable solution that combines the best of all three platforms.
If you have any questions leave a comment or get in touch with us, we are here to help!